
 Did you know about half of all small businesses fail within the first four years? It’s a scary statistic, but fortunately, you’re not one of the fallen. Your books are full. You’re grooming steadily all day long. The phones are ringing off the hook – it’s a dream come true, right?
There can sometimes be a dark side to all of this success. Do you feel like no matter how hard you work, how efficiently you groom, you just can’t get ahead? Is your first available appointment still three weeks out – or more? Is your cancellation list getting longer and longer?
I’ll bet you’re tired.
Stressed.
Frustrated.
Wondering why you ever opened your own business.
After all, wasn’t it supposed to be fun and satisfying to finally be your own boss? Yet somehow, grooming all those cute little fluffy puppies has lost its appeal.
Sound familiar? I’ve been there more times than I care to admit!
What are you going to do?
The easy solution would be to hire another groomer. Unfortunately, finding someone talented, reliable, and a good fit for your team can be quite challenging. Most grooming schools have far more job requests than their graduates could fill. Placing an ad in any type of help wanted advertising outlet yields only crickets when it comes to finding anybody even remotely qualified to groom dogs and cats.
 This is an age-old problem. I don’t know of a single successful grooming business that has not faced this dilemma at some point.
Don’t fret. You have options. Some are more long-term solutions. Others can be implemented instantly for immediate relief.
- Train your own groomers and stylists from scratch.
- Delegate basic tasks.
- Hire an assistant.
- Become exclusive by raising your prices, which will instantly lighten your client load.
Training your own groomers and stylists from the ground up is a great long-term solution – and sometimes the only option. It’s not a quick fix, but it is something you will want to keep in the back of your mind for the future. If you opt to go this route, keep in mind it will typically take six months to a year to train to someone who can independently groom dogs.
If you are a salon owner, my guess is you wear many hats when it comes to running your business. What if you could have someone else do some of the NON-grooming related tasks? Hire someone full or part-time to do the tasks you really don’t need to be doing. Things like:
- cleaning
- laundry services
- running errands
- bookkeeping
- payroll
- data entry
 Delegate anything you can to assist with the smooth running of your business – or your home – which is not directly related to grooming.
Training a grooming assistant is a great option. Having someone to help with the more elementary tasks of grooming pets isn’t as time-consuming or difficult as training a full-fledged groomer. Yet, a well-trained assistant can almost double your productivity. A large bulk of the time grooming dogs is eaten up in the wet room.
Yes, training an assistant takes time but you will make that time up quickly! It will go even faster if you utilize the Core Skills videos in the Learn2GroomDogs.com online library. Combine that with select sections from the first 80 pages of Notes From the Grooming Table – Second Edition, and you have a winning recipe for success. Let’s face it, half of the time spent grooming dogs is spent in the bathing, drying, and fluffing areas.
There are other benefits to having an assistant work with you. They can jump in to help with other simple tasks when you really need another set of hands. Wouldn’t it be great to have someone who could:
- help handle a challenging pet
- answer the phone
- run dogs and do potty breaks
- help with customers
- clean and sanitize
- do laundry
…the list could go on and on.
Many successful stylists just don’t want to deal with a staff. They want to keep it simple. Uncomplicated. Stress-free. Yet if you have way too many clients, the demands on your time and your sanity will be quickly tested.
 If the other three options are not good fits for you, maybe raising your prices and becoming exclusive is the best option. If you stop and do the math, it can be pretty enlightening. Raising your prices by $5 to $10 per dog will weed out your client load almost instantly, freeing up your time – and giving you time to breathe.
When you feel you could work twenty-four hours per day, seven days a week, and still not have sufficient time to get everything done – it’s time for a change. Situations like this are what contribute to safety issues, affect your personal life – maybe even your health.
Success is a great thing as long as you manage the growing pains of your business. If you don’t, the business is going to be running you instead of you running your company.
If you are one of the success stories with an abundance of pooches (or felines) coming through your doors, congratulations! Remember – managing growth is just as important as creating an amazing service for your customers. If you are feeling frustrated and stressed out, make the change you feel best fits your situation. Get off that work overload treadmill. Once you do, you might even enjoy your business again!
Has this ever happened to you? What did you do? Jump over to the Learn2GroomDogs Facebook page and tell us about it!
Happy Trimming!
~ Melissa
 Setbacks.
 One day all that changed.
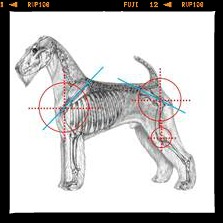 To complicate things even further, I started attending clinics. Advanced clinics. The demonstrators were talking about structure…movement… angles. I was totally lost. All this information was over my head. But I never gave up. As baffled as I was, I was still fascinated. I wanted to figure it out.
 Think about how the medical profession is organized… when you need a routine annual medical exam, do you book an appointment with a Podiatrist? No. You’d get an appointment at your regular clinic, where they deal primarily with routine and preventive health care. Depending on your condition, you might get an appointment with a nurse practitioner who is qualified to treat a certain spectrum of illnesses. For situations requiring more formal training and experience, you’d see your family doctor. If a health disorder required attention from an expert in a particular field of study, you would seek the help of a specialist.
 Bathers, Assistants, and Bathing Technicians should have a basic understanding of:<

 One my companies, Whiskers Resort and Pet Spa, is phenomenal at impressing people which in turn gets them talking. We do virtually zero paid advertising. Instead, we focus on those four key elements listed above; delighting our customers, being interesting, earning our clients’ trust, and making it easy for them to talk about us.
 Here is another way to foster word of mouth marketing. Photos and events. Over the years, the Whiskers team has hosted many special events for both our overnight guests and doggie daycare clients. The entire goal for these events it to get people talking in the community. The parties are promoted through our monthly client newsletter and Facebook page. It works.
 These are just a few ideas to help you get folks talking about you. There are thousands of ways to get the ball rolling – it just takes a little forethought and creativity on your part.

 Proper hygiene is also crucial. It should go unsaid, but being clean and odor-free is a must. There is nothing more offensive – and embarrassing – than personal body odor. The famous motivational speaker Zig Ziglar, noted, “People often say that motivation doesn’t last. Well, neither does bathing – that’s why we recommend it daily.” Nothing could be more true!
 That night she retired to her hotel room. As soon as she got there she hooked onto the Wi-Fi and brought up Learn2GroomDogs.com.

 Over the years I’ve had the opportunity to work with all types of professional groomers and stylists. I have seen some of the most talented pet stylists struggle to maintain a healthy clientele. Even if they were passionate about their trade, maintaining a robust clientele and growing a business just wasn’t in the cards for them. At the same time, I have seen mediocre groomers grow an amazing repeat client base that keeps their appointment book overflowing.
 In a service-based business like pet grooming, having a highly personalized team of people handle your clientele is the key to a thriving business. Technical skills will only take you so far. Being able to win over the trust and hearts of your clientele is the real key to a successful grooming business.
 from happening? How do you keep your job fresh? Fun? Rewarding?
 Here is the rating scale I’ve used to rate a dog’s (or cat’s) personality.
 This one can be a little tricky. If they are just mildly annoying, deal with it professionally but don’t put any more effort into the client than needed to keep them at bay. If they are rude and nasty, most likely they are just that way all the time – that’s how they go through life. I would do a great job for them, just like with any other client, but I would not go out of my way to do anything “special.”
 Strike one: we let them off with a mild warning.
 “How do we handle that?’ I thought to myself at the end of a very long day. We were tossing color options around and having a hard time deciding. Then it hit me. The cover should be the color of a nice glass of red wine – something we were all going to be celebrating with once this massive project was finished!