Log InCartCall Now: (616) 667-7297

Westminster Dog Show: What I’m Watching For This Year

1rrFebruary is Westminster dog show month! It is one of the few dog shows getting full national TV coverage at the Groups and Best In Show levels. I look forward to it. Every. Single. Year.

I will be parked in front of my big screen TV for both nights watching and studying.

This year I’m even more excited. The 140th Westminster Dog Show is coming on the heels of a two-day advanced grooming session we just filmed for Learn2GroomDogs.com.

Master pet stylist, Irina “Pina” Pinkusevich, was our guest Training Partner. Guess what? Just three years ago she won the prestigious Groomer of the Year Award which was presented at the Westminster Kennel Club Dog Show. She worked on six different dogs, all in show trims:

  1. Miniature Poodle in a Continental Trim
  2. Kerry Blue Terrier
  3. Bichon Frise
  4. English Setter
  5. English Springer Spaniel
  6. American Cocker Spaniel

Pina is one of the most advanced educators in our field. Every time I see her work on a dog, I learn something. These lessons were no different. What I especially love about Pina is that she has the inside scoop. She knows the hot styling trends and/or the direction they are going from the conformation show ring.

If you are focused on expanding your career as a high quality pet stylist, it’s more than just washing and knocking the hair off pets. It’s about anatomy. It’s about geometry. It’s about balance. It’s about style. It’s about bringing out the best of a dog based on its written standard. It’s about creating artful illusions. The art of pet styling is sculpting fur.

With every L2GD film shoot, I take detailed notes. With Pina, I find it challenging to keep up. My fingers never stop on my keyboard as I watch her work. I always walk away with loads of notes from her lessons.

Here just three takeaways that I learned from Pina two weeks ago. As I watch this year’s dog show, I will be noticing how these particular trends apply to the dogs in the ring on Monday and Tuesday nights.

Takeaways From the Learn2GroomDogs.com Film Sessions with Irina “Pina” Pinkusevich

Number 1: The ⅔ to ⅓ Rule

I’d never heard this rule of balance, style, and proportions before. Pina said when a dog is in properly balanced, the ratio is ⅔ to ⅓. Two-thirds makes up the front section of the dog. One-third makes up the rear of the dog. When trimming, the tuck-up or front jacket will be placed at the dividing line between the ⅔ and ⅓ points to create proper balance on a dog.

To test the theory, we pulled a number of images of top winning show dogs.

Dang!

There it was there over and over again. I also pulled images of the gorgeously groomed dogs Pina has done for Learn2GroomDogs.com.


Yep… the rule holds true on all of them, too.

This rule might be a new concept to many of us, but it’s been put into practice in the conformation ring for quite some time.

I will be watching to see how this rule plays out on the big screen at the dog show.

Number 2: The Lowest Point on the Throat is Level with the Topline or Loin

What??!

The throat is level with the topline? Seriously? This one caught me off guard. But then I started looking. Really looking. Sure enough. There is was over and over again. It especially held true on the Sporting dogs.

OK, I get it. Level with the back but what if you have a dog with a “sloping topline?” Now where do you take the point of reference from? The loin. It’s the point just in front of the hip bones on the top of the back. Draw an imaginary line from that point level and straight forward to the throat. That’s the lowest point on a clipped throat.

“Huh…,” I thought as I raised a questioning eyebrow. I will be on the lookout for this new grooming development. I saw how the rule held up in the Sporting dog images we pulled – but would it hold up to other breeds in different groups as well? I can’t wait to see how many Sporting Dogs utilize this “rule.” Trust me – I’ll be looking!

Number 3: Use the Front Pastern as a Guide When Setting the Undercarriage on Well Coated Dogs

Really?!

There is a point of reference when setting this line? Who knew? Certainly not me! I would just eyeball it and pray. My guess is I’m not the only one out there who has used that technique.

This principle applies nicely to many of the Setters and some of the Spaniels in the Sporting Group – as long as they have long enough furnishings to pull it off.

I’ll be keeping my eyes peeled to see if this third rule applies to other breeds, as well.
We had many more aha! moments while we watched Pina work her magic on these six lovely dogs. We will be releasing Pina’s latest L2GD video lessons all through 2016.

The three points I chose to outline here are all points I’ll be looking for closely as I watch this years televised Group and Best in Show classes at the 140th annual Westminster Dog Show.

People say to me all the time, “But I only groom pets… I don’t need to know how to groom show dogs.” You know what? I only groomed pets, too. But that never stopped me from learning as much as I can about what different breeds SHOULD look like. If you don’t have any reference as to what a nice representation of a breed looks like, how are you going to know how to bring out the best of any purebred or mixed breed?

Watching a dog show of this caliber keeps me fresh and excited. Watching top stylists at work, like our Training Partners with Learn2GroomDogs.com does, too. I hope you will join me as I hunker down Monday and Tuesday night to watch the show. I know I’ll have a pencil and paper close by to take notes!

February 15 and 16, 2016 marks the 140th Westminster Kennel Club Annual Dog Show. There are 199 breeds and varieties are eligible to compete. For 2016, there are nearly 3,000 dogs entered. For more information on the dog show, streaming or television schedules go to: http://www.westminsterkennelclub.org/

Happy Trimming!

~ Melissa

P.S.

Did these tricks surprise you? Go online and tell us what you think on the Learn2GroomDogs Facebook page.

How to Brighten a Dogs Coat Using a Staple Pantry Item

Today, we have a wide assortment of products to make our grooming jobs easier. They give us better results and may even help us do the job faster. It could be anything from a shampoo, to a coat conditioner. It might be a magical spray or powder you apply to the coat. Take a look at any grooming catalog and you’ll find a vast array of items from a variety of manufacturers that can take care of just about anything you could need.

But how do you know exactly what to reach for when a unique situation presents itself? Sometimes you don’t always know what you need. Or maybe what you need is a specialty item and you don’t have it at your fingertips. What do you do then?
Smart groomers and stylists often turn to home remedies. Years before we had the variety of products we do today, most clever groomers turned to their own cabinets for solutions. They used their ingenuity and developed home remedies to solve their grooming dilemmas.

Recently on the Learn2GroomDogs.com set, we had an unusual situation. Luckily, we had the masters of home remedies in for a filming weekend, Lisa Leady and Suesan Watson. (If you haven’t caught their L2GD lesson on home remedies – click here! Not only is it educational, the sister duo missed their true calling as a comedy routine!)

All of the dogs for that filming weekend were dogs that were supplied to us, sight unseen. We’d simply made the request for eight dogs.

The criteria was:

  1. They needed enough fur so that Lisa and Sue could actually groom them.
  2. The dogs needed reasonably nice temperaments.

That’s it.

While we were at lunch, the dogs were checked in. Our team had placed them in a holding area to await their afternoon film session. When we returned, we were excited to see what was we had to film. I knew all our afternoon dogs were mixed breeds that had come from a large 300+ dog puppy mill rescue that took place a few years ago. Luckily, all of the dogs found loving homes. The family supplying the dogs for the Learn2Groom film shoot had adopted three of the puppies. Many of the rescued pets were Shih Tzus, Pomeranians, Malteses, or mixes of the three breeds.
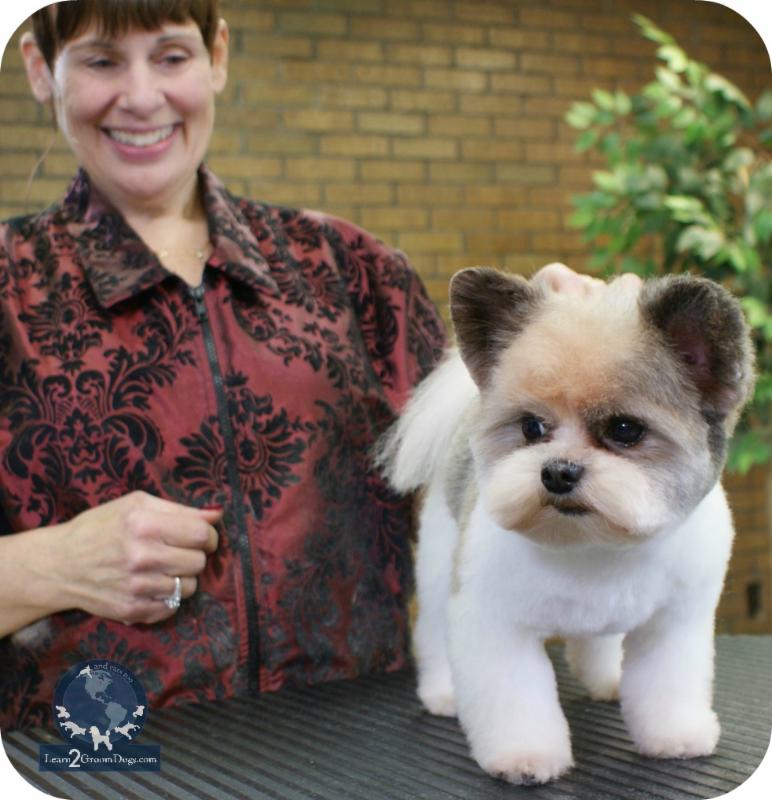
When we walked into the kennel room at the Paragon School of Pet Grooming, we were so excited. Every dog was adorable! But one really stood out – a Pomeranian/Shih Tzu mix. It had plenty of coat that brought out a few key features, making him even more appealing. But it did have a problem – and it was smack dab on the top of his head: a huge, rusty-colored lick stain.

If you’ve been in this profession for any amount of time, you know exactly what we were looking at. Apparently, one of his four-legged siblings had taken to cleaning the top of his head on a frequent basis. The constant licking had turned the white fur a rusty red color. He also had a fair amount of rust staining near his eyes and around his mouth.

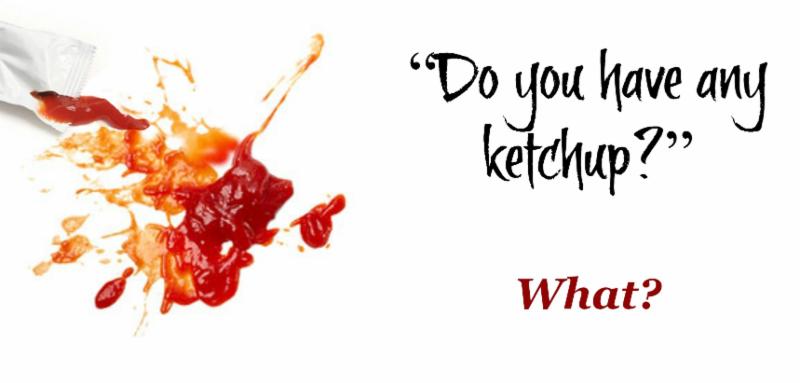
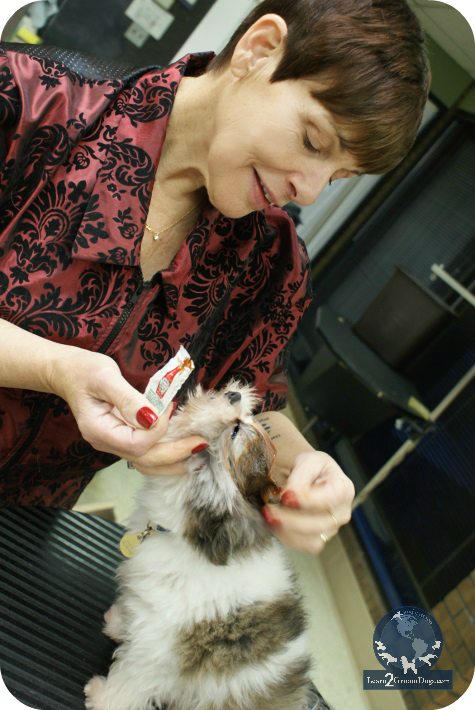
Sue immediately reached for this little cutie. As she was snuggling with him she looked me right in the eyes and said, “Do you have any ketchup?”

What?

Why did Sue want ketchup?? Even though I hadn’t said a word, my expression must have asked the question.

Sue quickly went on to explain that ketchup would lighten the stain on the top of the dog’s head. “Really?” I exclaimed. I didn’t bother to question her – I knew she had something good up her sleeve. Sue said it didn’t matter what brand of ketchup we chose – any ketchup would work. I quickly went and found a couple packets of ketchup in the kitchen and handed them to her.

We took the dog out onto the practical skills floor and set him on a grooming table. Sue simply opened a package of ketchup and started to apply it to the dry coat. She generously worked it into the top of his head, under his eyes, and on his muzzle area. Once the ketchup had thoroughly saturated the hair, we set this little guy aside to sit for about 30 minutes before bathing him.

I was amazed after Sue bathed and dried this little dog. The rust-colored staining was significantly lighter! Was it gone altogether? No. But it was considerably lighter on the top of his head. Around his eyes and on his muzzle area it was almost totally removed.

I was astounded.

Sue suggested that we do a couple more applications in the future to really lighten the top of his head.

After seeing what a single application of ketchup (yes ketchup!) had done to brighten this dog’s coat, there was no doubt in my mind that a few more applications would lighten the stain even further.

I love home remedies when it comes to grooming. These problem-solvers are made from items that you just naturally have on hand. Many times they are common pantry items that all of us have hidden away in drawers or cupboards.

Who knew you could use ketchup to lighten and brighten the coat? It was a new one for me.

Watch for Suesan Watson in an upcoming Learn2GroomDogs.com video lesson featuring this adorable little Pomeranian/Shih Tzu mix.  Join today!

Happy Trimming!

~ Melissa

P.S.

Do you have any tricks like this one? Tell us about them on the Learn2GroomDogs Facebook page.


The Importance of Canine Anatomy

“Why bother learning about canine anatomy?” is a phrase I hear all the time.

If you are a “professional groomer,” this is the most important lesson you can learn. Combined with effective pet handling, understanding canine anatomy is the FOUNDATION of all good grooming.

MV Skeletal StructurerrIf you don’t know how the pet is put together – or in some cases – SHOULD be put together, you simply won’t do a good job at your profession. You will not earn the trust and cooperation of a pets entrusted to you. So, whether you are a long time groomer, a newbie, or a bather working with a team of pet stylists – understanding canine anatomy is critical to your success.

All dogs, regardless of breed, possess identical bone and muscle structure. Fundamentally, all dogs – from Great Danes to Yorkies – are the same. The domestic dog is the end result of generations of carefully controlled breeding practices. Man has domesticated dogs to assist us in many daily functions.

Many breeds still do the jobs they were bred to do, such as herding, hunting or tracking. As times changed, the breeds remained but it was no longer necessary for them to perform these tasks. Other breeds have evolved a proficiency in other activities that allow them to continue to assist man.

For every purebred dog, there is a written standard developed by parent breed organizations that outlines what the “ideal” dog of that breed should be. The key to maintaining a dog in a condition to proficiently perform its original role is to know the standard.

lesson 1I get it. Being able to decipher the official breed standard can be challenging at first. Speaking the “language” is a key component to understanding how to work professionally with dogs. As I was coming up the ranks, I struggled with understanding the written breed standard, too. It was like Greek to me! However, with focus and intentional study, I did learn it – and so can you!

In order to safely handle a dog during grooming or to style the dog to accentuate its best features, you need to understand basic anatomy and individual breed standards.

  • What are the key components that make up a structurally sound and balanced animal, purebred or mixed breed?
  • How do you measure or select reference points?
  • How do you apply those points in the trimming process?
  • How can you handle or manipulate the dog to create a harmonious relationship?

For dogs with definite trim styles, you can accentuate proper structure while minimizing conformational faults. To the untrained eye, accentuating or detracting from the conformation of the pet will be subtle. However, it will make a large difference in the overall quality of the haircut.

Are you familiar with the dog’s natural movement limitations? If you are, you can make grooming much more comfortable for the pet. When the pet is comfortable, it is much more willing to cooperate. If you don’t understand the mechanics of a pet and try to move it beyond its physical limitations, you will eventually cause or contribute to an injury. Understanding key pressure points as well as using proper holding techniques allows both the pet and the stylist the greatest degree of safety through the entire grooming process.

Scottie FramworkrrTHE STRUCTURE OF A DOG: FRONT & REAR ASSEMBLIES

Front Assembly

This area makes up the shoulder and front legs. It consists of bones, muscles, and tendons. The angles of the bones, combined with their length, dictate how efficiently the dog will move. The shoulder blade is held in place by muscles and tendons that allow for good forward and back movement, but is limited from side to side. Some dogs are more limber than others. When lifting a foot or leg, never extend it beyond the point of mild resistance when the dog is relaxed.

Rear Assembly

Bones, muscles, and tendons make up the hips and rear legs. The angles of the bones, combined with their length, dictate how efficiently the dog will move. The pelvic and femur bones are held in place by a ball and socket that form the hip joint. The ball and socket offers a greater degree of rotation through the hip joint than in the front assembly. However, older dogs or dogs with joint discomfort will not be as flexible as a pet that is pain free. When lifting a foot or leg, never extend it beyond the point of mild resistance when the dog is relaxed.

Welsh Box StructurerrMEASURING A DOG: KEY LANDMARKS

Outline of a Dog

The overall length of a dog is measured from the point of shoulder to the point of rump and from withers to ground. The distance between the withers and the top of the elbow and the distance between the elbow and the ground will dictate the overall balance and proportion of a dog. Most breed standards refer to the body proportion as being square or rectangular.

Measuring the Head

Skull types come in a wide variety of shapes and sizes. The overall length refers to the points from the occiput to the tip of the nose. The stop area is frequently used as a key measuring point of the relationship between the length of topskull and the muzzle.

PATTERN SETTING

Pattern Setting

All patterns are set in relationship to bones and muscles on the dog. There are a few key areas about the neck, chest, shoulders, ribs, and thighs that allow stylists to set body patterns on the dog that are well-balanced and symmetrical. On the head, the key pattern-setting points are the stop area, eye socket rims, ears, cheeks, the back corners of the mouth, and the occiput.

Sporting Dog StructurerrWhether you are working on a show dog or a family pet, where you set the pattern will make a huge impact on your finished groom. On dogs with haircuts, pattern placement is critical to create a stylish haircut that accentuates the dog’s features in a positive light.

Balance, style, and flair all are seen at their best when a trim is founded on a sound basic knowledge of overall canine anatomy. Like anything else, the more knowledge one has on a topic, the easier it is to apply. With time, correct application will become second nature.

Happy trimming!

~Melissa

PS.

To learn more on this important topic, log in to Learn2GroomDogs.com and check out our video, Canine Anatomy!

Here is a preview

[youtube]https://youtu.be/iPBmW7nB0Qg[/youtube]


Introducing the ALL NEW Learn2Groomdogs.com Website!

It’s a new look – AND MORE!

big image


In 2010, we were thrilled to announce the launch of Learn2GroomDogs.com. It was something brand new to the pet grooming industry – an online library that streamed videos right to your computer, phone, or device. We opened our cyber doors with 60 videos and were thrilled with the response from professional and amateur groomers, alike.

Fast forward four years later and Learn2GroomDogs.com has over 500 videos – and we’re still growing!

Now we invite you to see our biggest surprise, yet… our brand new, completely reconstructed website with amazing features created just for you!

It’s beautiful and easy to use!

We wanted you to love looking at the site. It needed to be fresh and inviting, with crisp colors and beautiful photos.

The layout needed to be fun and functional with a logical format so you can navigate easily.

We wanted all of our information to be fun as well as informative. You’re our guests, so to make you feel more welcome, we loosened up a little and had some fun. We think you’ll like our new style!

Wait until you see our new Search feature!

s2We know how hard it was to find what you needed, so we really dug deep to make this the best feature. We’re thrilled with the capabilities of our new site. e

Search by Category

Choose from a wide variety of search items, including: video length, topic, and dog group.

Search by Expert

Find your favorite Training Partners – Melissa Verplank, Lisa Leady, Lindsey Dicken, and many more!

Search by Breed

Looking for Bichons? Poodles? Terriers? How about mixed breeds? We’ve got them!

… and because sometimes you just need to browse to find what you’re looking for, we’ve made that easier, too! Just type in a keyword to look around.

There are so many ways to find what you need!

Try it for yourself!

There is so much more to see and experience – it’s impossible to tell you about everything.  Try it and see for yourself. You’re going to love the new Learn2GroomDogs.com!

Coming to you in January 2015!


The Art of Packaging – Gifts for Grooming Clients

Holiday Packaging #1rrI love this time year. There is so much to do. So many details to attend to. So many opportunities to visit with friends and family. So many thoughtful gifts to give and receive. Everything revolves around people we love and appreciate – including our clients.

For many of us in the pet grooming business, this is one of the busiest times of year. The fur is flying, clippers are clipping, scissors are sculpting, and festive bows adorn most pets as they walk out the doors.

This is also the time year that clients can be extremely generous with gifts. Do you have a special gift ready to reciprocate?

When I ran my mobile grooming business of 6 vans, we gave bags of assorted dog biscuit treats. Even though we packaged up the bags a day or two ahead of time, gift-giving for all our clients had become quite the chore.

At that time, a good friend lived with me. She was a fashion designer and has since gone on to become a very successful stylist for photo and video shoots. Her attention to detail was immense. She watched me early one morning as I was assembling the gifts. The kitchen was totally lined with white – individually decorated – paper lunch bags. There must have been at least 40 of them. I had CASES of biscuits lining the edges. “After all, each gift had to have a wide assortment…” or so I thought.

I would grab a large scoop of one variety of biscuits and start dropping a few into each bag. I would make my way around to every bag. Then I would move to the next variety of biscuits and do the same. Then, the next type of crunchy treat. The process seemed to go on forever until the bag was about half full. I would then fold the tops over and staple each of them.

blog imageMy friend watched with her steaming cup of coffee for multiple days before she finally said to me, “Melissa, there’s a better way to do this. The gift is not about the size of the package – it’s about the presentation.”

“Really,” I said with raised eyebrows.

She came into the kitchen, opening the drawer that held my plastic baggies. She grabbed a plastic bag, a pair scissors and some pretty ribbon. She proceeded to drop 4-5 biscuits into the corner of the plastic bag. She tied the bag off with a pretty ribbon in a simple knot and trimmed the edges at an angle. Finally, she cut the excess off of the plastic bag top.

Ta-da!


She had created a gorgeous gift in no time. It was simple. It was elegant. It was classy. It was a gift that was easy to give and receive.

I must have learned that lesson almost 30 years ago. I still carry it with me today. The gift isn’t necessarily about the size of the gift or the cost. It’s about the presentation.

It did not take us long to graduate from the small plastic baggie. The generic baggies required trimming to make it appear presentation worthy. We quickly discovered you can order bags and a wide variety of custom sizes.

Today we look at the items we need to package. We order plastic bags that are appropriately sized to custom fit whatever we need to package. Dog biscuits gift bags to welcome packages and everything in between.

We have used this principle over and over again in all of my companies with great success. The next time a client gives you a generous tip – or a plate of holiday cookies – you’ll have something worthy to hand them in exchange.

Happy Trimming!

~Melissa

P.S.

Here is the new video from Learn2GroomDogs.com!

[youtube]http://youtu.be/3L4ZEo9XPmk[/youtube]


click-here


Surviving the Holiday Rush

After working professional in the pet grooming industry over 35 years, the only time I worry about dealing with clients is the Christmas holiday season.

The two weeks preceding the actual day can be a chaotic mess.  With Christmas shopping, decorating, baking, family gatherings, holiday socials to attend, and every regular client you have wanting to be booked as close to Christmas as possible . . . phew!  December can be an exhausting month!

But, wait – t doesn’t have to be!  Christmas organizing all year round will let you create that picture perfect holiday without nearly the stress.

Getting Organized & Ready

The Salon

  1. Is it clean – really clean? Floors, walls, kennels?
  2. Is the lighting up to snuff?
  3. Are your laundry machines working properly?
  4. Are the tubs draining?
  5. What are the conditions of your pet dryers?
  6. Are your blowing fuses on a regular basis in one outlet?
  7. Does your computer need to be de-bugged for a glitch free running machine?
  8. Do you have a stock pile of all the office supplies you’ll need?
  9. Are your blades shears all sharp and ready to go?
  10. Are your clippers operating smoothly?
  11. What is your stock level of all your dispensable products? Shampoos, conditioners, cologne, flea foggers, cotton balls, ear cleaner, etc.
  12. Are there plenty of towels on the shelves?

The Holiday Image

  1. Are your holiday decorations fresh and up-to date for your salon?  Keep it simple and easy… pick a simple theme and work with it.
  2. Do you have your client’s gifts ready to go so they can easily be passed out when the client is having their pet groomed?  Remember, expense isn’t the key, packaging is. Pay attention to the details.
  3. Have fun with festive accessories.  Head gear, costume jewelry – anything that can bring a smile to someone else is a good thing.
  4. Are all your holiday bows special and pre-tied?  Are bandanas ready to be attached to the pet?
  5. Do you have red and green nail polish that is actually usable?  What about other colors?
  6. Do you have plenty of air freshener to lend a sparkle to the air without being overly powering?
  7. Music is everywhere – is your holiday collection handy or is there an ‘all Christmas’ station you can tune into?
  8. Have you brought extra clothing or makeup to freshen up after work before heading out?
  9. If you’re worried that you’ll be slow after the holiday season, do you have any grooming promotions for January and February that you can be handing out now?

$$ Saving Tip: Buy all your holiday items the day after the holiday to save up to 50% the retail price; fabric for bandanas, decorations, Christmas cards…

Getting Through the Dogs

  1. What are the pros and cons of working extra hours?
  2. Should you take on new clients?
  3. Make sure all your regular clients have their holiday appointments BEFORE taking on new clients or ‘non- regulars.’
  4. Hiring extra help – is there something you can easily delegate with some basic training that would free you up to deal with clients?  Cleaning? Answering the phone?  Taking out the trash?
  5. Have you worked out a system to maximize the types of pets you take per stylist?
  6. Work out a drop-off and pick-up schedule that allows you to stay focused on grooming pets.
  7. Stay calm, cool, and collected no matter what happens during the course of the day.
  8. Set realistic time goals that push you, but stay on target.  Use an egg timer if necessary or place a clock where you can’t miss it – no matter what.
  9. Use every speed trick in the book from prepping – to bathing – to drying – to trimming.
  10. When clients pick up their pet, are you offering a promotion to assist in re-booking 6 weeks down the road when it can traditionally be really slow?

Organization on a Personal Level

  1. Do you have a master list of all the things you need to do for the holidays?  Is it broken down into smaller do-able chunks?  What about a master gift list that’s simply updated year to year?  Master Christmas card list?  Weekly meal planner? Regular shopping tick-sheet list?  For great inspiration go to www.organizedchristmas.com
  2. Are you are a store, catalog, or Internet shopper?  Are you prepared to have ALL your holiday gift shopping done by December 15?  What about the wrapping?
  3. As time gets closer, demands get greater and healthy meals go by the wayside…  If you are in a city, do you have a full selection of menus at your fingertips?  Who has great take-out that you quickly sweep in and grab on the way home or while you are at the shop?  If you are a country dweller, is your freezer packed with great frozen meals that only require reheating whether homemade or store-bought.
  4. Does a messy house stress you out?  Before is gets really busy, clean and organize the house or hire someone to help you… (or if you have kids, enlist their help.)  Also think about having carpets cleaned, windows washed, or dropping you heaping laundry off at a laundromat, letting them do it for you.
  5. Do you need a masseuse or chiropractor to help you stay loose and limber ? If you do, book your appointment early.

After the Holiday?

  1. Take the week off! Trust me – your clients don’t need you for the week between Christmas and New Year’s!  Take that time and spend it on yourself and your loved ones!  You’ve earned it.

With a little bit of pre-planning, you’ll be breezing through the holiday.  It’s so much more enjoyable for everyone to be in a festive spirit instead of being the Grinch.  Put some effort into setting yourself up to enjoy the best of the season – it makes the time fly by.  And you might even get a few moments to relish this time of year!

Happy trimming!

~Melissa


Nine Seconds to Make a First Impression

Dog-Computer-Wallpaper-1024x768rrYou meet someone for the first time – it could be a new client walking through your doors, someone at a grooming trade show or a new team member.

The moment that stranger sees you, their brain makes a thousand assumptions.  It might be a new client or someone you meet anywhere else.  You are giving off clues about yourself before you ever begin to speak.  They are gathering a wealth of nonverbal clues about you.

What are nonverbal clues?

Nonverbal clues include all the ways you present and express yourself, apart from the actual words you speak.  Things like eye contact, gestures, posture, body movements, and tone of voice.  All of these signals can convey important information that isn’t put into words.  They are extremely important at work and in business.  Perception is reality.

If you are dealing with a prospective customer – the following items will instantly fly through their head upon your first meeting:

  • Are you trustworthy?
  • Will you be kind to their pet?
  • Do you have the skills required to groom their dog or cat?
  • Are you likable?
  • Are you confident?
  • Will you charge a fair price for your services?

These impressions form at lightning speed.  Making major decisions about another person happens within seconds of meeting them.

Picture1In business, first impressions are crucial.  You can’t stop people from making snap decisions – the human brain is hardwired this way as prehistoric survival mechanism.  However, you can understand how to make those decisions work in your favor.

First impressions are more heavily influenced by nonverbal clues than verbal clues.  In fact, studies have found that nonverbal clues have over four times the impact on the impression you make than anything you say.

Here are nine nonverbal ways to make a positive first impression with a grooming client, a new team member or a new business associate.

  1. Present yourself professionally.  Blue jeans, sweatshirts, T-shirts and a baseball cap are not professional.  If you are in your shop or van, wear fresh garments that repel dirt, grime and hair.  At a trade show? Dress in ‘professional casual.’
  1. Pay attention to details.  Hair style, light make-up (for women) and your nails all give strong visual cues.  Having fun with personal style is fine – as long as it stays a little more on the conservative side.  Over-the-top piercings, tattoos and gauges will not instantly form a positive impression on most people you meet – especially prospective clients.
  1. Attitude – attitude – attitude.  People pick up on your attitude instantly.  Before you turn to greet someone, or address a team member, or walk into a trade show, think about the situation.  Make a conscious choice about the attitude you want to project.
  1. Fine-tune your posture.  Position and authority are non-verbally conveyed by height and space.  Standing tall, pulling your shoulders back, and holding your head high are all signs of confidence and competence.
  1. Facial expression.  Human faces are incredibly expressive including the eyes, eyebrows, mouth, and any other movement.  Open your eyes slightly more than normal to simulate the ‘eyebrow flash’.  This is the universal signal of recognition and acknowledgment.  Emotions such as anger, happiness, hurt, and boredom are all easily expressed with facial movements.
  1. Smile more.  A smile is an invitation, a sign of welcome.  It says you are friendly and approachable.  Smile at the pooch too.  Owners love that!
  1. Make eye contact.  To transmit energy look at someone’s eyes.  Looking into someone’s eyes indicate interest and openness.  And if that person has a pet in tow, make sure you look into the pets eyes as well.
  1. The handshake.  This is the quickest way to establish a connection.  It’s also the most effective.  Here’s an interesting fact.  On average it takes about three hours of continuous interaction to develop the same level a rapport that you get with a single handshake.  A firm handshake indicates a strong personality.  But don’t crush someone else’s hand – as groomers, our hands are typically really strong!  A weak handshake is taken as a lack of strength.
  1. Lean forward slightly.  Leaning forward shows you’re engaged and attentive.  But be respectful of the other person space.  That normally means staying about two feet away.

Every encounter from chatting with new clients, going to trade shows or attending training sessions presents an opportunity to meet people.  It’s a great way to network, expanding your professional contacts.  Making a positive first impression counts.  You’ve got nine seconds – but if you handle it well, those nine seconds are all you need.

~Happy trimming,

Melissa

PS.

You should check out our videos on Learn2GroomDogs.com.  Here is a featured video clip from our channel on YouTube:

click-here


Creating the Round Head with a Clipper – Drop Coated Head Styling

1rrThere are a number of different ways to create a round head style on a dog.

Here are two clipper options that will help you be more consistent from trim to trim.

Setting the Pattern

Use this hold to define sections of the head that are to be clipped or to be hand scissored:

2rrStanding in front of the dog, place your hands just behind the eyes so both thumbs touch under the jaw and both first fingers touch just above the eyes.

  • Anything behind your hands is considered the skull and should be clipped.
  • Anything in front of your fingers is considered the eye area and muzzle and should be shaped by hand.

3rrUsing a similar hold, place your fingers around the neck of the dog.  Slide your hands up until they rest at the base of the ears.  This is your dividing line between the neck and headpiece.

The length will vary based on client preference and length of body coat.  The shorter the body length, the shorter the head should be.  Longer trims look balanced with longer head styles as long as they are not extreme.  In both cases, it’s most important that the head be in balance with the body.

Style Option #1:

  • Take the same blade used to trim the body and use it again for the top of the head and down the sides of the cheeks.
  • If a #4F, #5F, #7F or #2 guard was used on the body, follow the natural lay of the coat, working out from the center of the skull.
  • Feather the coat over the tops of the ears and at the transition line just behind the eyes separating the head with the muzzle area.  There will be an imaginary line just behind the eyes where you can feel the eye socket rims.  The hair over the eyes in this area should be left to hand scissor, framing the eyes in the final stages of the trim.
  • Lift the ears out of the way and come down the sides of the face, in the cheek/jowl area.  Follow the lay of the coat and blend into the clipped neck. Leave just enough hair at the back corners of the eyes to complete the framework for the eyes in the finished trim.

Style Option #2

  • Use a medium to medium-long guard comb for small – to medium-sized pets; longer combs can be used on larger dogs.  The key is the head should ‘balance’ the trim and compliment the dog in size and shape.
  • Due to the length of coat these combs leave, they are most effective when pulled forward from the occiput to the eye area.  Your goal is to feather to coat at the transition point, softly framing the eyes.  The outer edge of the guard comb should ride right at the junction point of where the ear meets the skull.
  • The cheeks and jowl areas are handled the same way as outlined above.

Common Styling Techniques with Both Round Head Styles

The stop area should be trimmed for both options.  Personally, I like to catch this area when I do my close sanitation work just before I do the full haircut.  Don’t remove too much coat between the eyes – less will be better than more.  Focus on the area just in front of the eyes and the stop area.  Use thinning shears or clip the area with a close blade, such as a #10 or a #15.  This will clear the area of long fur and accentuate a nice, deep-set eye.

With both head styles, the framed area over the eyes should be scissored by hand.  Comb the coat forward over the eyes, making sure to get the hair in the stop area, too.

Scissor off the longer hair at a 45-degree angle, starting at the stop area.  The fur will be super short right above the eye and taper out slightly over the eye, framing it.

Use straight or curved shears in reverse, framing the eyes trimming up and over the eyes.  The beveled edge creates a ledge for the longer coat to sit on, keeping it out of the eyes.  It also creates a desirable “soft expression.”  A deep-set eye adds dignity and character to the facial expression, too.  There should be just enough depth to this frame to accomplish the look, but not so much as to give a heavy “visor” look.

Double-check and triple check this line framing the eyes.  It is the most important part of the entire trim.  Pay close attention to the stop area – this is an area that long strays love to hide.  The last thing you want is to have random hairs pop out once the dog gets home!

4rrOnce you are satisfied that the frame is even, the line will still be sharp.  Soften the framed area with thinning shears.

Double-check the line just behind the eyes where the clipper work feathers off.  It should be smooth and even at the transition point.

Check the transition lines over and around the ears and neck.  Use thinning shears to neaten these areas.  Make sure to look behind and under the ears too.  Follow the line under the jaw, too.  Everything should be even, neat and tidy.

The muzzle on many round head styles is trimmed by hand, keeping the eyes and nose at the center.  However, there are multiple style options.  Many stylists like to continue their longer guard comb work on the muzzle as well.  Or you can scissor it by hand.

When using a guard come on the muzzle, you can work either with the grain of the coat or against the coat growth with longer combs.  Once you are close to a consistent length – stop and finish the area by hand with thinner or blending shears.

For hand scissoring the muzzle coat, comb the coat down.  Use the jawbone as your guide.  Trim parallel to the jawbone adjusting the length as needed.  Once the length is established, finish trimming the area with thinning shears for a soft and even look.

Many owners appreciate removing the longer hair right under the nose, at the end of the muzzle.  On round-headed dogs, this is extra fur that gets messy at feeding time – collecting water and picking up all sorts of nasty things as the dog is outdoors sniffing around.  There are two basic ways to deal with this area:

  1. Simply hold the dog’s mouth firmly closed and quickly remove the extra hair with a close blade – anything from a #30 #15 or #10 blade will work.  Just watch that tongue!
  2. Hand scissoring works, too.  Use either thinners or a smaller pair of shears to trim the hair away from this area.  Comb the coat forward at the end of the muzzle.  Trim off the excess.  You can also taper the area back towards the neck.  This will help prevent dirt and debris from collecting in this area and provide a neat and tidy appearance to the overall head.

To finish the head style, soften all lines with thinning or blending shears.  Look for stray hair or anything that is out of place.  There should be no sharp lines anywhere on the head.  From side-to-side you are looking for symmetry, both in length and density.

In the end, the expression should be soft and kind.   The eyes will be the key feature you want to highlight.  Framing the eyes, you bring out the pet’s expression – something every pet owner loves to see!

 If you liked this lesson, you’ll love this video.  You’ll find it on Learn2GroomDogs.com.

[youtube]http://youtu.be/NzLWtaBFAoc[/youtube]

Not a member?  It’s easy to join – click here!

Happy trimming!

~Melissa


10 Tips for Trimming Nails in a Professional Grooming Salon

30063787_mrrWe all dread this phone call.

You’ve just groomed one of your favorite client’s dogs. The nails were super long so you trimmed them. You accidentally got one nail too short. It bled.

A lot.

You didn’t panic. You had the tools and know-how to fix the bleeding toenail. You successfully stopped the bleeding and finished the groom. The dog left your salon looking fabulous and with nicely trimmed nails. You might have even painted them – pink.

Half an hour later, the client calls in a panic. Their freshly groomed pooch is bleeding from a toe. It’s getting all over everything – and they have no idea what to do!! Their back hall looks like a war zone. There is blood everywhere!! And to make matters even worse – the carpet is light cream-colored.

The client wants to know two things:

  1. How do they stop the bleeding?!?!
  2. What are you going to do about their new cream-colored carpet??

What do you do? You have a very upset client on your hands, a dog with a bleeding toenail, and probably a huge carpet cleaning bill. You groan. You shake your head in disbelief. You kick yourself for not checking that nail one more time before the pet left.

Sound familiar? Yep. If you’ve been grooming dogs professionally for any amount of time, you know first-hand what I’m talking about.

Personally, I’m not a nail Nazi. I will get nails as short as I can without bleeding them. However, I have groomers that are a bit more diligent about getting nails trimmed back so they don’t tap the floor. They routinely have to use a styptic powder to get nails to stop bleeding.

Whether I’m dealing with a groomer who believes in getting nails short or someone who is a bit softer on the nail front like me, I still have rules.

Here are my 10 Nail Trimming Guidelines:

  1. Trim nails as closely as possible without creating a bloodbath.
  2. If you do trim a nail too close and it bleeds, use it is as a reference guide so you don’t repeat trimming another nail too short.
  3. If you do bleed a nail, use styptic powder to stop the bleeding. Apply a generous pinch of powder to the nail tip. Hold FIRM pressure on the end of the nail for a MINIMUM of 30 seconds (count OUT LOUD!). If the nail is REALLY a bleeder, hold the powder to a count of 60.
  4. If there is blood on the fur, clean up the area with hydrogen peroxide.
  5. Check the nail again before the pet leaves.
  6. ALWAYS inform the client if any nail was trimmed too short. Let them know what toe it was and have them keep an eye on the foot.
  7. Instruct the client not to let the dog run across abrasive surfaces like concrete or asphalt for the next few hours.
  8. Always send the client home with a nail mending kit that includes a small amount of styptic powder and instructions on how to use it.
  9. If they have ANY problems, inform them to call or text the shop immediately.
  10. If the nail breaks open again in the car or at their home and the client needs professional help to clean up the blood, pay the bill – no questions asked.

These are the policies I put forth in my shops. If you run a professional salon, nails are occasionally going to be trimmed too closely. By following my 10 step action plan when the inevitable does happen, we are proactive in our customer service approach. We the head off all problems prior to the pet even leaving the shop with a nail that is trimmed too short. Hopefully you will, too.

-Happy trimming,

Melissa


PS

Here’s a video about nail art you won’t want to miss!


[youtube]http://youtu.be/GW3VUhh_YsE?list=UU6QEPG7JG7exQRpEr9e_nHA[/youtube]


click-here


Tips for Booking a Smooth Holiday Season

blog imagerDon’t blink. The holidays are going to be here before you know it. Are you ready?

If you have a reasonably busy salon – and have been at this for a few years – you know the holiday season is crunch time. In a very narrow window of opportunity, you will be busy grooming the regular clients in your database.

Every

one

of

them.

Are you going to let your clients run rampant over you or are you going to take charge of the situation before it runs out of control?

The holidays are a special time of year. Yes, it’s one of the busiest times for a professional grooming salon. However, it’s also the time of year to enjoy time with those closest to your heart.  If you are chained to your grooming table throughout the entire holiday season – how can you possibly enjoy your family and friends?

Sure, keeping your customers happy is important, but so is your family. So are your close personal friends. Don’t let the insanity of the holiday season put a damper on your festive mood.

Believe me, I learned the hard way, too. Grooming super long hours up to 14 days straight before Christmas left me totally spent and exhausted. I was definitely a Scrooge throughout the entire holiday season. I knew I had to make a change when one Christmas I literally slept through the entire day.

Here’s a trick I implemented a number of years ago. It’s worked like a gem for me and my teams.

We start looking at our holiday season in September. We start booking our top priority clients months out. How do we figure out which clients those are? Simple.

We start pre-booking all our premiere clients based on the number of weeks between grooming appointments. It’s a service we offer to our best clients for free.

We work in the following order:

Weekly clients get top billing. They get their choice of premier times and days. Once those clients are booked, we move to our biweekly clients. Next, our two-week clients are booked, then we move on to our three-weekers and so on until we reach the end of our 6-week clients. Always go in that order.

By the time we complete pre-booking all of our holiday appointments, there are very few holes left to fill with other regular customers. Those are the only other customers that we would take. Any customer that walks through our doors for grooming appointment during the holiday season MUST have a history with our grooming salon. During the peak holiday season, we never take a new customer.

Once we started utilizing this type of scheduling, the three days prior to a major holiday were a breeze. Almost every dog on the schedule is at least a three week client. How hard is it to groom dogs like that? You know the answer to that – they are EASY!

To me, that’s this best way to deal with the holiday season. Take care your best customers. Set limitations on how many dogs you going to do per day. You will be busy but you won’t (and shouldn’t) be chained to your grooming table during the entire holiday season.

Never forget the true meaning of the holidays. They are meant to be spent with family and close friends.

Have you already pre-booked all of your holiday appointments? Excellent . You’re well and your way to having a joyful and well organized holiday season. If you haven’t already started booking those clients – don’t waste any more time. Start now.

You can see more on this topic – and so much more – on Learn2GroomDogs.com.

-Happy trimming,

Melissa


error: Content is protected !!