Log InCartCall Now: (616) 667-7297

How Do You Remove Track Lines from a Coat?

I still remember how frustrated I got when I first started grooming.

eraserI was the assistant, doing mostly bathing and drying for the groomer. One day, she was overbooked and was falling deeply behind schedule. She had a basic “all trim” on a larger dog that she hadn’t even started yet. Out of desperation she asked if I would remove some of the coat before the bath.

I thought to myself, “Sure, why not? How hard could it really be?” I picked up the A2 clipper as the groomer handed me the appropriate head. I twisted it on and set to work.

What a mess. The dog wasn’t hurt but my work was awful. The dog was full of uneven coat and lots of tracking.

The groomer had always made it look so easy. Coat seemed to melt off like a hot knife through butter. Her clipper work was always smooth and even. No track marks. No sticky-outies.

This was not nearly as easy as I thought!

However, I stuck with it.

Quote In A CircleThe groomer coached me as I struggled with the second side. It turned out somewhat better but was far from perfect. Today, I would not consider my work that day as acceptable – not even as pre-work before the bath. It was that bad! Luckily, I didn’t have to worry about all the tracking. It was just the rough cut before the bath. Once the dog was clean and blown dry, the groomer finished it in no time.

Fast forward 10 years. I had mastered the clippers and figured out how to eliminate tracking in the coat. On rare occasions, I still had problems. By that time, I was in my own mobile grooming van and running my own business. One of my clients was a buff American Cocker whose owners wanted clipper cut.

Most of you who have been groomers for any amount of time know some buff-colored Cockers track terribly when clipper cutting. This dog was no exception.

It didn’t matter what blade I chose.

Tracks.

It didn’t matter how powerful the clipper was.

Tracks.

It didn’t matter what time of year it was.

TRACKS.

The. Coat. ALWAYS. Tracked.

On one appointment, I basically threw my hands up. I could not get the tracking out of the coat. I had used all the tricks I knew to no avail. As I sat there contemplating how to remove the lines, I had an idea. What would happen if I reversed a blade over this coat? Hmmm. At that point, I figured I didn’t have much to lose.

I tried out the technique on an obscure spot on the dog’s body. I reversed a #7F blade then stepped back to check my work. I realized it was going to be way too short. I bumped up to a longer #4F blade. When I tried again – it was perfect. It was the length of a #7 blade. And even better, it was baby butt smooth. Eureka!

Over the years, I’d figured out how to get all coat types super smooth, but this Cocker type coat had always given me trouble. Once I mastered that coat type, coat tracking was a thing of the past for me.

So how do you get coat super smooth without any tracks?

There is not one simple answer but there are lots of techniques and trouble-shooting options. Here are a few tricks that I discovered with years of practice.

Page 479 Ways to Eliminate Track Marks

  • You need super sharp blades. The sharper the blade, the faster and smoother the cut.
  • Get a powerful set of clippers. They don’t necessarily have to be large and clunky. They do need to have enough power, speed, and torque to glide effortlessly through a thick coat.
  • Use consistent speed when clipping through the coat. As you guide the clippers through the coat, you need to run the clipper consistently over the pet’s body.
  • Card thick and dense coats before AND after. Dead undercoat clogs clipper blades. Removing as much dead undercoat prior to clipping and then again after the clipping will greatly reduce lines.
  • Always follow the lay of the coat either clipping with the grain or against the coat growth. Cross coat cutting typically creates track lines. Focus on working with the natural lay of the coat.
  • Reverse blade clipping. When the coat growth pattern is distinctive, reverse clipping can be beneficial to remove or eliminate clipper tracks. Instead of working with the coat growth, work directly against it. Reverse clipping cuts the coat closer than working with the grain. Always bump the blade up two lengths longer – a #4F cuts the length of a #7F with the grain.
  • Maintain a consistent degree of tip on the blade as you clip. Every clipper blade works most efficiently when the heel of the blade is tipped up slightly. The shorter the clipping action, the higher the degree of tip.
  • Keep consistent pressure against the skin as you clip. Typically, the weight of the clipper is the correct pressure to apply. Keep a supple wrist as you guide the clipper over the pet’s body.
  • Fine detailed thinners work as erasers on stubborn lines. When all else fails, you can buffer clipper lines with thinning shears, knocking off just the high points of the tracks.

Every coat type is a little bit different. Some coats barely track at all. Others are almost impossible to get smooth. Learning how to minimize tracking takes time and practice. Mastering a smooth clipper cut in the least amount of time takes focus and attention to details.

There are a lot of moving parts when it comes to mastering clean perfect clipper work. Groomers who have mastered a track free simple “All Trim,” on a regular small to medium-sized can groom a pet in one hour or less.

If you struggle with this problem, my book, Notes from the Grooming Table, has a very detailed section about clipper work in the front of the book. My Learn2GroomDogs.com streaming video platform also has some great videos about efficient clipper work in the Core Video Category. Make sure to check out those two educational resources. If you work with a team of stylists, someone within your group might be able to coach and mentor you. You can also look for local clinics or workshops where you can work with a seasoned professional.

Happy trimming!

Melissa

 MVpaw_no_Inner_whiteWhat are the tricks you’ve used to eliminate tracking? Jump on the Learn2GroomDogs.com Facebook page and tell us about it.


How to be an Indispensable Groomer’s Assistant

Wallpapersxl Dog The Wet Hq For 695583 1366x768It always shocks me when a competitor or a workshop participant presents me with a DIRTY DOG for evaluation. A dirty dog?! No joke – it happens all the time.

Nails are not trimmed correctly.Coats are not dried properly or completely.

…or worse yet, there are still mats and tangles left in the coat.

It’s not good grooming but I see all the time. Not only in the ring or at hands-on events, but in salons, too.

To me, bathing and drying are the most critical parts of any groom. One bather can make or break your entire grooming department.

Here are 7 skills I look for in an indispensable groomers’ assistant (AKA the bather!) All 7 of these skills must be MASTERED if you want to be highly valued in your grooming salon, if you want to move ahead in your career, or before you can gather loads of glowing clients.

1Be able to identify popular breeds

Anybody working professionally with pets needs to be able to identify the top 15 or 20 breeds that regularly come into your salon. It’s the fastest way for groomers to be able to communicate to one another.

2Be able to handle pets safely and compassionately

How many times have you heard others (or maybe even yourself) say, “This dog is driving me nuts!” Impatient treatment of a pet is never acceptable. If you lose control, you can bet that you won’t have clients for long. Being able to understand canine body language is job requirement #1. If you are going to win the pet’s trust and cooperation, you must be able to speak its language. It will keep you and the pet safe. It will also make the entire experience much more enjoyable for all parties.

3Understand the many different coat types found on individual pets

Each coat type has special needs that need to be addressed in the bathing and drying process to get the best results. A Beagle has different bathing and drying needs than a Standard Poodle. The same holds true with a coat on a Golden Retriever or an Airedale Terrier. A talented bather will instantly be able to identify dogs that possess simple coats or dogs that are going to be time-consuming and a challenge.

4Bathe the dogs until their coats squeak

If they don’t squeak, they are not clean.

Period.

This is the foundation of every fabulous grooming job. I cannot stress its importance enough. There are many products on the market to help achieve superior results in only one or two baths. Even if you use the best shampoos on the market, the dog will not get squeaky clean unless they are rinsed thoroughly. Rinse until the water runs clear and you hear the “squeak” when you push the water through the coat. And not just the easy to see or reach parts. Get soap and water to the undercarriage, under the ears, and the special parts. If the whole dog isn’t clean – it’s still dirty. Nothing wastes time or money more than having to re-bathe a dog because you didn’t do the job right the first time. There’s an old saying: if you don’t have time to do it right, when will you have time to do it over? Get it right the first time.

5Dry the coat to perfection

Most of the time, this will mean utilizing a form of active drying. There are several drying methods and combinations to choose from, based on the coat type, trim, and the pets’ tolerance. Incorrect techniques or careless attention to drying will waste more time than almost anything else in the grooming process. In most cases, high velocity and stretch (or fluff) drying techniques will need to be used to get superior results. Oh, and the pet needs to be bone dry too!

6Learn efficient and SAFE brushing techniques

Systematic brushing is the only way to effectively work through a coat and get right down to the skin. Selecting the correct tool for the coat type will be important. Knowing how to hold the tool along and how much pressure to exert is also important. Not enough pressure and you will not be efficient. Too much pressure and you’re going to make the pet uncomfortable and could cause injury. The key is to work methodically and gently over the entire dog – right down to the skin until a wide tooth comb can easily be pulled through the fur.

7Nails, ears, and glands

Trimming nails and cleaning ears is just an automatic process when it comes to grooming pets. If it is not done – or not done well – it’s considered sloppy. Clients don’t want to spend their hard-earned money on sloppy work. Stylists executing haircuts should not have to go back and double-check this type of preliminary pre-work. Some salons routinely check and/or express anal glands. Whatever your salon option is, you should follow their guidelines.

Being a bather – or being a groomers’ assistant – can be extremely rewarding. However, it does carry a lot of responsibility. Many of these skills are considered the foundation of all grooming.

Remember: every owner faces a choice when it comes to grooming. They can come to you, do the job themselves, not have the pet groomed all… or go down the road to someone else. Make sure they make the right choice by sticking with you.

What do you look for in a great groomer assistant? Jump over to the Learn2GroomDogs Facebook page and tell us about it!

Happy Trimming!

~ Melissa


3 Books to Help Build an Amazing Grooming Career

The choice to groom my first dog wasn’t mine. I had been working as kennel help and would occasionally help the groomer when my tasks were done. Nothing major, just bathing a few dogs, trimming some toenails, maybe brushing out some mats. I might even dry a few dogs by hand.

One day all that changed.

I still remember that call from my boss. She phoned me at home one night to tell me the full-time groomer we’d had was no longer with the salon. In an instant, my job changed from kennel help to groomer.

My first day on the job, I had six dogs on my roster – and no clue how to groom them. At the time there was nothing like Notes From the Grooming Table or even The Theory of 5 to guide me down this new path. Being young and fearless has its advantages – and yes, I got through my first day at my new job.

I won’t say that during those first few months I did beautiful work. Far from it. But there was something about it I liked. I was working with animals. Being creative. Having a skill that needed to be mastered. I found it all rewarding and challenging at the same time. The more I learned about dogs – and grooming them – the more I wanted to understand how to do it well.

Wanting to learn more brought me to voluntary certification testing. I studied breed standards and terminology. I learned about structure and movement. I worked hard to achieve competition level pet styling. As I became more knowledgeable, my skill level at the grooming table improved immensely.

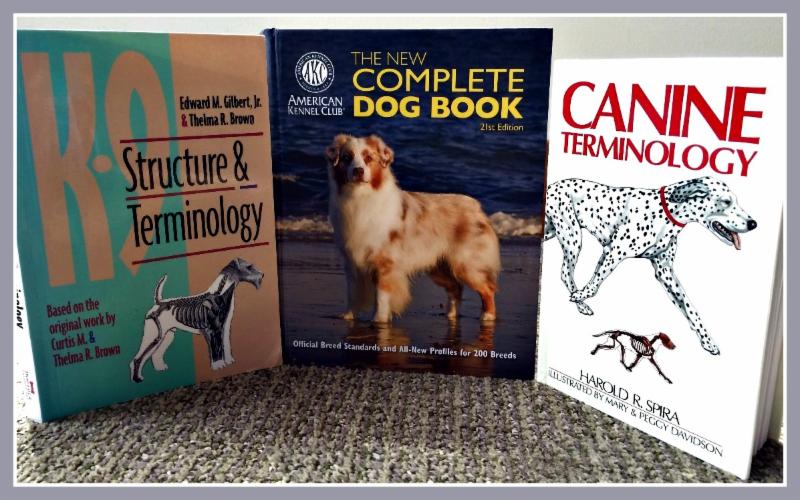
In some ways, educating myself was like learning a foreign language. I bought my first AKC Complete Dog Book in 1979. It was the yellow one. Since then I have owned every version put out by the AKC including their latest edition (which is amazing by the way!).

I still remember that first yellow book. I soaked up the words but was clueless as to how to apply what I was reading. The terms and concepts were abstract in so many ways. I kept my trusty highlighter in my hand – but I really didn’t even know what I was highlighting. I tried to imagine what the words meant, but I couldn’t form a picture in my mind. I just didn’t know.

To complicate things even further, I started attending clinics. Advanced clinics. The demonstrators were talking about structure…movement… angles. I was totally lost. All this information was over my head. But I never gave up. As baffled as I was, I was still fascinated. I wanted to figure it out.

Every time I ran across a mysterious word in the AKC Complete Dog Book, I looked it up in the glossary. (Keep in mind this is long before the age of the internet and Google searches!) The more I learned – the more I wanted to learn. I started hunting for books that would help me understand how a dog was put together and why.

The next book I discovered was Canine Terminology, by Harold R. Spira. It was a gold mine! It was a visual dictionary of terms. All those things I struggled to imagine on my own, I could now see. How did those terms play out? What was a deep set eye? What was considered high ears? What were parallel planes? What was the difference between a cat foot and a hare foot? Any term that I found in the breed standards, I could almost always find a thorough explanation for in Canine Terminology.

I was feeling pretty confident as my knowledge grew. I could now envision what a dog that was standing still should look like based on the written standard. Yet, I still didn’t understand the “whys” of what I was doing. And I was certainly still clueless when it came to movement. All that talk about angles in the front and rear assemblies – what? How does that work? But more importantly why does it work – and when a dog is not built correctly, how does it affect the dog?

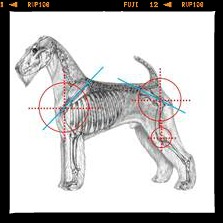
That’s when I discovered K9 Structure & Terminology, by Edward M. Gilbert, Jr. and Thelma R. Brown. It was like a light bulb going off in my head. I still didn’t totally understand the angles but I could visually see how the angles would work together when it came to effective movement. What I really loved about this book was the authors’ use of wild animals as examples. They talked about how the animals were structurally designed to survive – and thrive – in their environments.

The domesticated dog is a man-made creature. Breeds were originally bred and developed to assist man to do thousands of jobs. Almost all purebred dogs have some working trait in their backgrounds. How they are structurally put together allowed them to work efficiently – or not – for the job they were designed to do. Man stole those ideas by studying wild animals. With controlled breeding, man was able to create dogs designed to excel in areas wherever they needed help. The domesticated dog was there, working right beside man, to survive and thrive.

Today, many of those working roles are no longer required due to advancement in the industrial age and technology. Many breeds have been lost – while other ancient breeds still exist in small pockets around the globe. By the same token, new breeds are being developed in the domestic dog to meet the changing needs of mankind.

In the 12 years since I wrote Notes From the Grooming Table, there have been over 50 new breeds introduced to the American Kennel Club (that’s why I wrote the new Second Edition). When we travel outside the US, there are many breeds that we have never heard of – or seen – yet they are ancient breeds to their countries. Most of these breeds have specific roles and duties. The structure of the dog determines whether they are efficient in their roles – or not.

As professional all-breed pet groomers and stylists, it is critical that we understand the finer attributes of what makes up a purebred dog. The better we understand what the breed was developed for, how it was used, and what the ideal specimen should look like, the better we become with our craft. Plus, this knowledge allows us to interact and better understand our pet clients every day.

Regardless of how you get your training – through a formal training program, an apprenticeship program, or even if you are self-taught – never stop learning.

Knowledge builds confidence. The more confident you have, the more proficient you will be with every dog that crosses your table. Understanding allows you to take advantage of opportunities when they land at your feet. Education, knowledge, and the desire to grow are the tools you need to reach your maximum potential.

What books or learning tools have helped you succeed? Jump over to the Learn2GroomDogs Facebook page and tell us what works best for you!

Happy Trimming!

~ Melissa


The German Trim That Went to China

Today was one of those great days. One of those days where something special happens out of the blue. It’s not scheduled. It’s not planned. But when it happens – it just makes you smile.

Dawn brought her Wahl to the Wall!

Dawn brought her Wahl to the Wall!

What happened? It was a simple phone call.

I was racing around trying to get through items on my to-do list. Every time I thought I was getting ahead, something would pop up and get added to the list. I felt like I was on a merry-go-round. It just would not stop. I knew it was going to be a real struggle to get to an appointment I had later in the afternoon.

And then my cell phone rang.

I looked down and saw who was. Dawn Omboy’s name appeared on the screen. That alone brought a smile to my face. I took a deep breath to get myself centered and then answered the phone, “Hello Dawn,” with a huge grin my face.

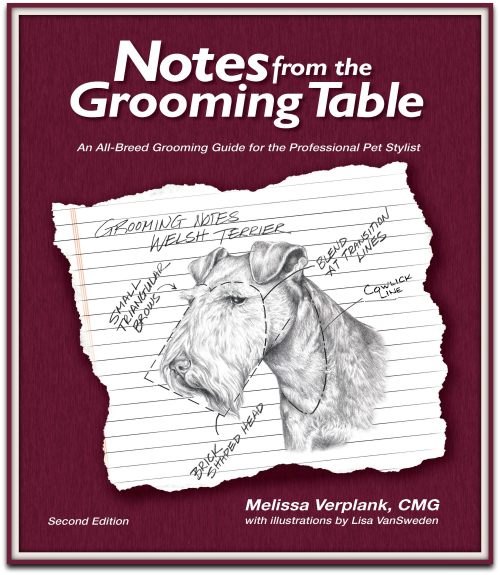
She was calling for two reasons. One was to thank me for her own personalized copy of Notes From the Grooming Table – Second Edition, which was on the way but had yet to arrive on her doorstep.

The second reason took a little longer to explain, but Dawn promised I was gonna love the story. “Okay Dawn, you’re on,” I thought to myself even though I was pressed for time.

My husband Marc and I had been at Dawn’s salon filming for Learn2GroomDogs.com just a couple of months ago. At the time, she had had the possibility of going to China to teach a clinic on creative pet grooming. Even though it wasn’t a sure thing yet, Dawn was so excited at the possibility! China. She’d never been there – let alone teach there! What an amazing opportunity for a little groomer out of southern Georgia.

A few weeks later we learned that the trip was confirmed and she was leaving the following week! She was so excited and we were thrilled for her. We tracked the trip on Facebook along with so many of her Facebook friends. She looked to be having a wonderful time even though she was traveling solo. (That’s one gutsy move all itself!) She told me she had a blast! Everything was wonderful and the people were so nice even though no one spoke English other than her interpreter – and that was dicey. She still knew it would be an adventure of a lifetime she would cherish.

While she was teaching the creative class, someone asked her if she would show them how to do a German trim on a Poodle. Even though they did not speak the language, she was able to make out what they wanted. And to add to that, they wanted it very full and “fancy.” Okay – she got that. The problem was, she couldn’t remember the last time she had done a German trim on a Poodle! But that was not going to stop Dawn…

Dawn – being extremely resourceful – was not going to disappoint her students, “Of course, she told them, I can show you how to do a German trim!”

That night she retired to her hotel room. As soon as she got there she hooked onto the Wi-Fi and brought up Learn2GroomDogs.com.

Did we mention she was in China?

She searched the database for German trims and found Judy Hudson had just what she needed on the site. She ordered herself a bit of dinner and spent the evening with Judy Hudson. Via streaming video, Judy taught Dawn the finer points of how to do a German trim on a Poodle.

The next day Dawn was confidently able to demonstrate to her foreign classroom how to do a German trim on a Poodle – all because of Learn2GroomDogs.com and Judy Hudson.

Dawn wanted to make sure I heard the story firsthand from her. I was beaming! I love our Training Partners and I love being able to help others. My dream is to make learning accessible to anybody – anywhere in the world. Between my books and Learn2GroomDogs.com – that dream is coming true. Even as far away as China!

And the best part – Judy Hudson flies in tomorrow for a National Dog Groomers Association of America workshop and testing held at the Paragon School a Pet Grooming (and some special saddle time with a couple Friesians). I can’t wait to relay this story to her, personally.

I cannot thank Dawn enough for sharing such a unique story. It’s amazing what our industry has to offer to anyone who applies themselves. The key is to be the best you can be and share that knowledge with others. Even if you don’t have the education in your head – having the right resources on the fly to locate information will turn you into an instant expert wherever you are.

Happy Trimming!

~ Melissa

P.S.

You never know when you’ll need to be an instant expert! Has this ever happened to you? Go online and tell us about it on the Learn2GroomDogs Facebook page.


2016-05-04_1546


The NEW Notes From the Grooming Table is HERE!


Notes From the Grooming Table has become an industry staple in most grooming salons. My guess is you have at least one copy tucked somewhere in your shop. Others have it right out in the open. The pages are stained, worn, and tattered.

I love seeing books that look like that!

The original Notes was released in 2004. It took three years to create the book. Lisa VanSweden did an amazing job illustrating the entire thing. It was a massive undertaking. There were times I questioned if we would ever complete it. At that time, I was questioning my sanity…

Thanks to all those copies tucked away in grooming salons and on book shelves around the world, Notes From the Grooming Table became one of the most popular grooming books ever written. I don’t question my sanity anymore.

Fast forward 10 years. The AKC was adding recognized breeds at a record pace. New grooming tools were being added to our tool kits. Coat types we had not seen before were walking into everyday pet salons. Styling trends were changing on a number of breeds. I knew it was time to think about updating Notes.

Like everyone else, I had a lot on my plate. When I first created Notes in the early 2000s, I only had one business, The Paragon School of Pet Grooming. Today I oversee four different companies, each with additional sub-companies. It was a lot easier for me to focus solely on writing the book on the first go around. Even then, there was an ongoing joke within my team. They all swore my husband Marc locked me in my home office and threw food under the door. In all honesty, they were not far off – especially in the last 6-8 months. Seven days a week with typical days running between 10-16 hours each.

We started talking about a revision in 2013, but it took until the fall of 2015 before the pieces fell together. Lisa and I felt like it was the Fall of 2003 all over again. The focus and the commitment to this revision was just as intense as the last 6-8 months on the first edition.

As we were getting close to finishing up the written section of Notes (I lost count on how many rounds of proofing went into the new version!) it dawned on us the cover needed to be updated. Hmmmm...

“How do we handle that?’ I thought to myself at the end of a very long day. We were tossing color options around and having a hard time deciding. Then it hit me. The cover should be the color of a nice glass of red wine – something we were all going to be celebrating with once this massive project was finished!

As I write this – I can see the finish line. Yesterday the very first three books hit the office HOT off the press. I don’t even think the ink was dry! We are definitely closing in on the finish line of the Notes From the Grooming Table revision. I can taste a lovely bottle of Cabernet Sauvignon about to get uncorked. If we dribble any on that new front cover, no one will know!

What’s inside? What’s new? Here’s a preview of what has been added to the Second Edition of Notes From the Grooming Table. Check it out.

  • THERE’S MORE! We’ve added 145 more pages.
  • NEW Bathing & Drying sections – including Hairless and Rustic Coats.
  • We’ve added tools and products that did not exist or were not commonly used in pet grooming prior to 2004.
  • Trim style trends on many of the breeds have been updated – including pattern lines and profiles.
  • NEW! What each dog group was designed to do.
  • Replaced the art on a number of illustrations to better showcase the breed.
  • Changed the terminology of guard combs to reflect the diverse brands in use today.
  • Additional illustrations to add clarity to grooming instructions.
  • Grooming directions for 51 new breeds added to the AKC since Notes was first released.
  • FINALLY! A complete index for easy reference.
  • Added the Miscellaneous Group section.

I’m so excited for this second release. Notes has stood the test of time and continues to be a leading reference guide in our industry. It’s been exciting to team up with Lisa VanSweden again to add all the new breeds while utilizing the easy to follow format that has made Notes From the Grooming Table so popular.

The art and diagrams as well as the easy to follow directions continue to be the hallmark of the book.  Every bit of this book was created in the USA – from conception, to creation, to printing, to distribution.

I’m super excited to share this with all of you. If you loved the old Notes From the Grooming Table, you are going to LOVE the second edition!

Make sure you watch previews and announcements coming out. They will tell you where you can get your own copy in the upcoming weeks. We have some special deals we are working on right now if you are one of the first to place your order.

Happy Trimming!

~ Melissa

P.S.

Go online and tell us what you think on the Learn2GroomDogs Facebook page.


3 Things You Need to Know to Groom Any Breed (What You Need to Do If a New Breed of Dog Lands on Your Grooming Table)

It’s a day like any other when you get a phone call from a client:

“I have a (insert breed here). Do you know how to groom them correctly?”

Um…

You’ve never groomed this breed before. In fact, the closest you’ve come to one is seeing it at a dog show. Maybe you’ve never even heard or seen the breed before.

“Why yes, Mrs. Jones, we certainly can make your Bedlington look like a Bedlington!” you say confidently as you book the appointment for the following day.

You hang up the phone and reality sets in. You’ve never seen this type of dog cross your grooming table. You don’t have a clue how to actually groom it correctly. What do you do?

The first thing I would tell you is – don’t panic!

Here are three core strategies you need to groom any breed of dog.
 

  1. Have strong technical skills. If your clipping, guard comb work, scissoring, blending, and basic hand stripping skills are good, you should be able handle this without much of a problem.
  2. Have a solid understanding of canine anatomy. If you understand how bones and muscles create a sound dog, it becomes even easier.
  3. Know how to translate a breed standard. If you can interpret the written breed standard into a visual, you’re golden.


So what is your next step? How are you going to be confident when that client walks in the door tomorrow?

Your next step is to look up the breed in reference books. If you have an American Kennel Club (AKC) Complete Dog Book (or a similar book from your country), start there. This will give you the official breed standard. Review the breed profile. Read about the history of the dog to gather clues about the dog. After a quick scan, you I have a good idea of the size, temperament, and structure of this new dog. Most books will also have photos that accompany each breed. If you don’t have an official breed standard book handy, you can always look it up online.

Once you have become familiar with the breed itself, take a look at your grooming books. Review the instructions. Compare the instructions to what you have read and saw in the breed standard.

The Internet is an invaluable research tool. Use it wisely. Most breeds will have a parent club that hosts an official site for the breed. Spend a few minutes reviewing images of top winning dogs in their galleries. With a little luck, you may even find grooming directions or links to grooming directions from dedicated breeders.

As groomers and stylists, we are a visual bunch. “A picture is worth a thousand words.” This is so true for us. I love to do Google image searches of breeds I’m not familiar with. Here’s a tip to finding good images. When you enter terms in the search bar, add keywords like: AKC Champion Bedlington Terrier or UKC Champion Fresian Water Dog. There is a big difference if you type into your search engine, “images of Miniature Schnauzers” verses “images of AKC Champion Miniature Schnauzers.” You will pull up a WIDE assortment of images. Some will be great. Others not so great. Some will be worthless. And others will be totally off the mark. You need to have enough knowledge to filter through the images, finding the best images to suit your needs.

Use a little caution when looking up information online. Always remember – not everything posted on the internet is correct or presents the best image of a breed. Make sure you use all your resources to gather the most accurate information possible.

3672638_lWatching videos on the breed in question is also a great option. Again, a word of caution – not every “how to video” on the internet will be beneficial. Today, anyone can post a video online. Unfortunately, there is a lot of poor quality grooming being featured – especially if it is free. Go to trusted sources like Learn2GroomDogs.com that are truly qualified to demonstrate how to groom a particular breed.

Yes, you need to do a little research. Will it require a little effort? Yep.

However, if you have those three nuggets of knowledge, you will have the foundation skills to groom any breed.

  1. strong technical skills
  2. solid comprehension of canine anatomy
  3. ability to interpret the breed standard

With those 3 skills, you can groom any breed of dog that comes your way.

If you are a newer stylist or just don’t have the time to do all the research, there is a shortcut. Notes From the Grooming Table will allow you to fast track your knowledge. Simply grab the book and turn to the breed you have a question about. We are just about to release the fully updated Second Edition of Notes From the Grooming Table. Keep your eyes open for how to get this revised edition – announcements on how to get yours will be available soon.

As pet groomers and stylists, we get to see plenty of dogs. It’s rare and exciting to get a breed you are not familiar with. Most of us pros enjoy the challenge of learning about a new breed. Figuring out what we will need to do to make the dog look like it should – or could – look like if the owners allow you to groom it correctly.

I know, I know… many owners just want the hair shaved off once they walk through your door. Or the dog is in such poor condition, the only humane option is to shave the coat off and start over. That’s always a disappointment once you’ve put in effort to educate yourself. Hopefully, the new client motivated you to learn few new things you can add to your knowledge toolbox even if you didn’t get to execute the trim!

Happy Trimming!

~ Melissa

P.S.

Did these tricks help? Go online and tell us what you think on the Learn2GroomDogs Facebook page.


Time = Money in a Pet Grooming Salon

blog imagerrTime is money in our business. Sure, we love pets. I don’t know anyone who gets involved in this career who isn’t passionate about animals. Still – time is money. And in this fast paced world, it never seems any of us have enough of either!

My goal is always to turn a small to medium-sized pet in an hour or less; bathe, dry, haircut, and/or finish-work on a bath and brush style pet.

If you are not turning at least a dog an hour, you have an issue somewhere in your routine.

Here are some ideas/methods that allow seasoned pet professionals to hit that goal. Take a read and see if you can identify ideas you can try to help increase your speed in the grooming department. The times given are for small to medium-sized pets.

Prep-Work: 5 – 15 minutes

  • Get the dog to the tub as quickly as possible. In the case of a 6 week or less small pet, 5 minutes would be enough time to do the nails, ears, and privates.
  • On a six-week or more pet, you may take up to 15 minutes to do the prep work. Quickly knock off the bulk of the coat to minimize wash and dry time. But still, no more than 15 minutes.
  • Leave loose matting alone. Soap, lather, conditioners, and high velocity dryers are magic on a clean coat. It will be much easier to remove in the bath and blow out stage.
  • If water cannot penetrate the mat or tangled coat, it needs to be removed prior to bathing.
  • Notice trouble areas whether it be dirt, oil, or matting. Pay attention to those areas when you move through the grooming process and handle them when it would be most effective.

Bathing Time: 5 – 10 minutes

  • Let gravity do the work when wetting a dog down. For smaller dogs, stand them up and let the water run from their shoulders.
  • Don’t worry about getting them TOTALLY soaked if you dilute your shampoo. Diluting shampoo allows for the water to act as a distributing agent of the shampoo, allowing for even saturation.
  • If you are working with a shampoo dilution ratio of 15:1 or more – skip wetting the dog down all together prior to applying shampoo. Just apply the shampoo and water together at the same time.
  • Apply shampoo in the same order, every time. Let gravity do the work. Start at the back, down the legs, under the tail, ears, and face.
  • Use a scrub brush or a rubber curry on very dirty dogs . This works well in exceptionally dirty areas to enhance speed, thoroughness, and ease of cleaning.
  • If washing twice, don’t worry about getting every trace of shampoo from the coat on the first rinse, only enough to remove the bulk of the dirt build-up.
  • If dealing with exceptionally dirty areas, let ‘em soak a bit before you handle them. Coated faces often have hardened food in them. Tackling them before the food has time to soften causes you too much work and discomfort for the pet. Use a bristled brush, toothbrush, or even a slicker brush for really tough, stuck in food particles.
  • If dealing with major mats, utilize a slicker brush in the tub. Just be sure to protect the skin while brushing through the matted coat. The shampoo will aid in making the coat slippery, much like getting a stubborn ring off a finger.
  • Use the correct shampoo for the job, especially in the “problem areas.”
  • Utilize some sort of squeegee to aid in the speedy and thorough removal of shampoo.
  • If the coat does not feel “squeaky clean,” it’s not rinsed well enough. Double check the area for soap residue or cleanness. Unclean coats appear oily when dry and will never allow for a quality finish in the final product. Soap residue can also lead to skin irritation.
  • Have a routine that you use to wash every dog and follow it every time. Repeating the same method EVERY TIME builds consistency, effectiveness, thoroughness, and speed.

Drying Time: 5 – 10 minutes

  • Squeegee and squeeze as much excessive water off as possible in the tub.
  • Utilize a towel magnet to take off the majority of the moisture.
  • Use a second towel to wrap the pet. Hold off on areas that do not lend themselves to wrapping. You will not be as effective as possible if there is any water dripping off any portion of the pet, feet, ears, tail, etc. You will also be ineffective if there is a visible spray of water coming off the pet when you do use the high velocity dryer with a condensing cone.
  • Turn on your dryer to let it come up to running temperature a few minutes prior to drying the pet.
  • If the pet is new to you or seems nervous, introduce the pet to the dryer slowly.
  • Once the pet has accepted the dryer, start at either the base of the tail or the withers. Where you start depends on how you want to set up the coat for finish work. Blow the coat so that it lies close to the skin (example: many Terrier or Sporting dogs) or fluffed up for clipper work (most haircut type trims). Next, move to the legs and finally the chest. If the dog allows it, work the head quickly as well. Go over the entire pet first with a condensing cone to remove loose water. Cover every inch of the pet in this manner. If there is a fair amount of moisture still retained in the coat during this process, hold a towel just ahead of where you are working to catch the spray, minimizing how much moisture is passed on to other areas.
  • If you are dealing with a curly coated dog, leave the condensing cone on to straighten the coat out, working the shortest areas first, moving into the longer areas and finishing with the head, ears, and tail. Do not move out of a small area until the coat is perfectly dry and fluffed.
  • If dealing with a shedding dog or a slightly matted dog, leave the condensing cone on, working in the same order as described earlier. Once the bulk of the moisture is removed, start again at the rump and work small areas until dry and loose coat is no longer coming out. Keep the air flow as close to the body as possible without folding the coat back onto itself.
  • If dealing with mats or tangles, use the force of the air to move the mats away from the skin. Stay in one area and move the air slightly, pushing the mats out. Watch the area closes to monitor the progress. It will look like a spider web as you loosen the tangle.
  • If dealing with a slightly wavy or straight coated dog, once the bulk of the moisture is removed, remove the condensing cone and hold the nozzle right next to the skin allowing for maximum temperature and lift of the coat.
  • If the pet has a long, shedding type coat, remove the condensing cone and place the air close to the pet’s body. Use a heavy brush where the air is flowing to “boost” the rest of the loose, spider webbed, coat out of the pet.
  • If dealing with longer coat that will need to be scissored or trimmed with a long guard attachment, “stretch drying” will be needed for additional lift and straightening of the coat. Use a heat dryer and a brush. With very light and rapid strokes, brush only where the air is blowing on the pet. Work against the grain if lift is needed for fullness. Work with the grain if a close lying coat is desired. Use caution – too much heat applied to an area can be painful or even burn the pet. In many cases, only sections will need to be attended to in this manner for optimum quality.
  • If you noticed mats still in the coat, finish with stretch drying the areas. Utilizing a heavy brush. Use line brushing techniques from the toes up the leg. Work with very small sections at a time and keeping the touch of the brush very light. Rapidly pat and pull the coat where the air is flowing over the area. Very little heat is needed for this method.

Clipping Time: 20 – 30

  • You are never done clipping until there is not anymore coat coming off when the coat is properly set up.
  • Three pass passes over the pet and you should have the coat super smooth… anything less than that will reduce time.
  • Minimize the amount of movement around the pet. Arrange the pet on the table so that the loop is taut but not tight. Place a small pet crosswise on the table minimizing groomer stretch and maximizing comfort.
  • Start your clipper work by standing behind the dog and pull the clippers towards you starting from the neck or withers. If you are reverse clipping, reverse the process by starting at the rear or the dog and work towards the head.
  • Handle the bulk of the body first, including the underside if that is to be clipped as well.
  • Lift the pet from the haunches to effectively get the undercarriage while still standing behind the pet.
  • Move to the side of the pet and work the neck and shoulder areas. Return to the rear of the pet and back brush the entire dog. Repeat process a second time. Back brush once again and check for high spots or rough spots.

Attitude

  • Work methodically; be friendly but aloof with the pet. Correct any undesirable action before it becomes a major problem. Accept what you cannot correct and work with it in a calm, cool, and collected manner. Once the job is complete, they you can snuggle with the pet and let it know how much you enjoy your job.
  • Always remember the “Three Cs” – Calm, Cool, and Collected. Whenever you forget them, you are wasting time and energy.

blog rrJust like pennies add up to dollars, seconds add up to minutes and hours. Anywhere you can save time without making a major sacrifice in safety or quality, it’s a skill or technique worth learning.

The most indispensable thing any of us can have it time; when it’s gone, it’s gone – never to be retrieved.

Time Frames for ProceduresrrHere is a graphic breakdown of how long each phase of grooming should take.  Print off a copy and keep one by your work station to help keep you on track.  Click here to download the PDF: Time Frames for Procedures.

Happy trimming,

~Melissa

P.S.

Click here to see the latest video available on Learn2GroomDogs.com.


How to Encourage Cold Weather Appointments

blog imagerrDo you live in a climate where you have seasonal changes in the weather patterns? For many groomers, the number of grooming appointments dips with the temperature. This can be a real problem if you rely on your grooming income to pay your bills!

How do you combat that problem? Encourage pre-booking.

It always amazes me how many clients have no idea what their pet needs in terms of coat care when the temperatures plummet.

Professional pet grooming is service driven. That means you must be a problem solver – even when your clients don’t know they have a problem! Thus, you become not only the problem solver but also the educator!

Just prior to some of the coldest weather of the season in the northern hemisphere, we have one of our busiest seasons – the holidays. Take advantage of your good fortune.

blog quoteHere are 6 of the most common problems associated with colder weather:

  1. Pet Hygiene: regular bathing is essential for pets that share our lives – and our homes.
  2. Regular Brushing: keeps the tangles away along with other benefits such as distributing oils through the coat and promoting circulation of the skin.
  3. Nails: they need to be trimmed and/or filed all winter.
  4. Feet: many breeds need the hair between the toes trimmed to keep them comfortable while outside.
  5. Coat Growth: it does slow down but trimming is still essential.
  6. Dryness & Static: both the skin and the coat can dry out – special shampoos and conditioners can combat the both dryness and static.

As you check out every pet, assume the client is going to rebook in 4 to 6 weeks.  Let them know that most pets benefit from regular grooming – even in the winter. It can be very helpful to have a marketing piece outlining the benefits of cold-weather grooming ready to hand out. Focus on the six items outlined above.

Always suggest the ideal time frame between appointments based on their dog’s coat type. Let them know you’ve saved a particular date just for them. If you know the client well enough, you’re going to know what they prefer for an appointment time. Offer that time to them.

If your clientele is price sensitive, try sweetening the deal. Offer a special winter incentive to book within 6 weeks of their last appointment date. $2-$5 off their normal grooming price is a common enticement to get them back on the grooming table.

Oops. You didn’t ask your clients to re-book?! Now what?

If you didn’t ask every one of your customers to rebook when they were in for their holiday appointment, don’t despair. For many grooming businesses, it is a bit slow right after the holidays. Take that down time to simply pick up the phone.

Systematically go through your appointments starting in the end of November and work your way to Dec 24th. Make a simple and friendly “courtesy call” to get their pet set up for their next appointment. Don’t forget to include your special discount for booking within 6 weeks of their last appointment.

4 Typical Cold Weather Issues Associated with Grooming

  1. It’s important to remember that coats and sweaters continually rub against a dog’s fur, constantly causing friction against the hair. If the coat is fur is longer, this can lead to mats and tangles. It’s best to remove doggie garments before they come inside. Remember, most of us don’t wear our heavy coats indoors. The same should happen with our pets. If they need a little added warmth, most folks opt for an indoor sweater. They can do the same with their dog.
  2. For dogs that are very short coated or the coat is very thin, doggie garments for both outside and inside are great options. However, constant sweater wearing leads to doggie odor, dry skin, and lots of static. All problems that can be addressed with regular professional grooming.
  3. If the dog normally gets a haircut, many owners enjoy a slightly longer style in the winter. Many of these longer styles are still low maintenance and easy to care for – especially if the dog is going out into the snow for a romp.
  4. Some owners extend the time between haircuts. If their pet has the type of coat that could easily get out of control without regular brushing, you’ll definitely want to encourage maintenance appointments between full haircuts. Maintenance appointments would include a bath using a moisturizing shampoo and conditioner, a full brush out, minor trimming around the eyes and feet, and sanitary areas. Nail trimming, ear cleaning, and fresh bows or bandanna are nice touches. Generally, these types are booked every 2 or three weeks and offered at a reduced rate.

Still slow? Plan for it. (Okay, maybe NEXT year plan for it…) But for now – bask in the glory of a little time to yourself! Use the time to dig into those shop projects you’ve been putting off. Shorten your workweek to 4 days or knock off a tiny bit early on select days. Or best yet – schedule your OWN vacation!

Happy Trimming!

~Melissa

P.S.

Here is the new video from Learn2GroomDogs.com!

[youtube]http://youtu.be/A2KLqT_ztZA[/youtube]

click-here


How do YOU boost cold weather appointments?


The Art of Packaging – Gifts for Grooming Clients

Holiday Packaging #1rrI love this time year. There is so much to do. So many details to attend to. So many opportunities to visit with friends and family. So many thoughtful gifts to give and receive. Everything revolves around people we love and appreciate – including our clients.

For many of us in the pet grooming business, this is one of the busiest times of year. The fur is flying, clippers are clipping, scissors are sculpting, and festive bows adorn most pets as they walk out the doors.

This is also the time year that clients can be extremely generous with gifts. Do you have a special gift ready to reciprocate?

When I ran my mobile grooming business of 6 vans, we gave bags of assorted dog biscuit treats. Even though we packaged up the bags a day or two ahead of time, gift-giving for all our clients had become quite the chore.

At that time, a good friend lived with me. She was a fashion designer and has since gone on to become a very successful stylist for photo and video shoots. Her attention to detail was immense. She watched me early one morning as I was assembling the gifts. The kitchen was totally lined with white – individually decorated – paper lunch bags. There must have been at least 40 of them. I had CASES of biscuits lining the edges. “After all, each gift had to have a wide assortment…” or so I thought.

I would grab a large scoop of one variety of biscuits and start dropping a few into each bag. I would make my way around to every bag. Then I would move to the next variety of biscuits and do the same. Then, the next type of crunchy treat. The process seemed to go on forever until the bag was about half full. I would then fold the tops over and staple each of them.

blog imageMy friend watched with her steaming cup of coffee for multiple days before she finally said to me, “Melissa, there’s a better way to do this. The gift is not about the size of the package – it’s about the presentation.”

“Really,” I said with raised eyebrows.

She came into the kitchen, opening the drawer that held my plastic baggies. She grabbed a plastic bag, a pair scissors and some pretty ribbon. She proceeded to drop 4-5 biscuits into the corner of the plastic bag. She tied the bag off with a pretty ribbon in a simple knot and trimmed the edges at an angle. Finally, she cut the excess off of the plastic bag top.

Ta-da!


She had created a gorgeous gift in no time. It was simple. It was elegant. It was classy. It was a gift that was easy to give and receive.

I must have learned that lesson almost 30 years ago. I still carry it with me today. The gift isn’t necessarily about the size of the gift or the cost. It’s about the presentation.

It did not take us long to graduate from the small plastic baggie. The generic baggies required trimming to make it appear presentation worthy. We quickly discovered you can order bags and a wide variety of custom sizes.

Today we look at the items we need to package. We order plastic bags that are appropriately sized to custom fit whatever we need to package. Dog biscuits gift bags to welcome packages and everything in between.

We have used this principle over and over again in all of my companies with great success. The next time a client gives you a generous tip – or a plate of holiday cookies – you’ll have something worthy to hand them in exchange.

Happy Trimming!

~Melissa

P.S.

Here is the new video from Learn2GroomDogs.com!

[youtube]http://youtu.be/3L4ZEo9XPmk[/youtube]


click-here


Surviving the Holiday Rush

blogrrAfter working professional in the pet grooming industry over 35 years, the only time I worry about dealing with clients is the Christmas holiday season.

The two weeks preceding the actual day can be a chaotic mess.  With Christmas shopping, decorating, baking, family gatherings, holiday socials to attend, and every regular client you have wanting to be booked as close to Christmas as possible . . . phew!  December can be an exhausting month!

But, wait – t doesn’t have to be!  Christmas organizing all year round will let you create that picture perfect holiday without nearly the stress.

Getting Organized & Ready

The Salon

  1. Is it clean – really clean? Floors, walls, kennels?
  2. Is the lighting up to snuff?
  3. Are your laundry machines working properly?
  4. Are the tubs draining?
  5. What are the conditions of your pet dryers?
  6. Are your blowing fuses on a regular basis in one outlet?
  7. Does your computer need to be de-bugged for a glitch free running machine?
  8. Do you have a stock pile of all the office supplies you’ll need?
  9. Are your blades shears all sharp and ready to go?
  10. Are your clippers operating smoothly?
  11. What is your stock level of all your dispensable products? Shampoos, conditioners, cologne, flea foggers, cotton balls, ear cleaner, etc.
  12. Are there plenty of towels on the shelves?

The Holiday Image

  1. Are your holiday decorations fresh and up-to date for your salon?  Keep it simple and easy… pick a simple theme and work with it.
  2. Do you have your client’s gifts ready to go so they can easily be passed out when the client is having their pet groomed?  Remember, expense isn’t the key, packaging is. Pay attention to the details.
  3. Have fun with festive accessories.  Head gear, costume jewelry – anything that can bring a smile to someone else is a good thing.
  4. Are all your holiday bows special and pre-tied?  Are bandanas ready to be attached to the pet?
  5. Do you have red and green nail polish that is actually usable?  What about other colors?
  6. Do you have plenty of air freshener to lend a sparkle to the air without being overly powering?
  7. Music is everywhere – is your holiday collection handy or is there an ‘all Christmas’ station you can tune into?
  8. Have you brought extra clothing or makeup to freshen up after work before heading out?
  9. If you’re worried that you’ll be slow after the holiday season, do you have any grooming promotions for January and February that you can be handing out now?

$$ Saving Tip: Buy all your holiday items the day after the holiday to save up to 50% the retail price; fabric for bandanas, decorations, Christmas cards…

Getting Through the Dogs

  1. What are the pros and cons of working extra hours?
  2. Should you take on new clients?
  3. Make sure all your regular clients have their holiday appointments BEFORE taking on new clients or ‘non- regulars.’
  4. Hiring extra help – is there something you can easily delegate with some basic training that would free you up to deal with clients?  Cleaning? Answering the phone?  Taking out the trash?
  5. Have you worked out a system to maximize the types of pets you take per stylist?
  6. Work out a drop-off and pick-up schedule that allows you to stay focused on grooming pets.
  7. Stay calm, cool, and collected no matter what happens during the course of the day.
  8. Set realistic time goals that push you, but stay on target.  Use an egg timer if necessary or place a clock where you can’t miss it – no matter what.
  9. Use every speed trick in the book from prepping – to bathing – to drying – to trimming.
  10. When clients pick up their pet, are you offering a promotion to assist in re-booking 6 weeks down the road when it can traditionally be really slow?

Organization on a Personal Level

  1. Do you have a master list of all the things you need to do for the holidays?  Is it broken down into smaller do-able chunks?  What about a master gift list that’s simply updated year to year?  Master Christmas card list?  Weekly meal planner? Regular shopping tick-sheet list?  For great inspiration go to www.organizedchristmas.com
  2. Are you are a store, catalog, or Internet shopper?  Are you prepared to have ALL your holiday gift shopping done by December 15?  What about the wrapping?
  3. As time gets closer, demands get greater and healthy meals go by the wayside…  If you are in a city, do you have a full selection of menus at your fingertips?  Who has great take-out that you quickly sweep in and grab on the way home or while you are at the shop?  If you are a country dweller, is your freezer packed with great frozen meals that only require reheating whether homemade or store-bought.
  4. Does a messy house stress you out?  Before is gets really busy, clean and organize the house or hire someone to help you… (or if you have kids, enlist their help.)  Also think about having carpets cleaned, windows washed, or dropping you heaping laundry off at a laundromat, letting them do it for you.
  5. Do you need a masseuse or chiropractor to help you stay loose and limber ? If you do, book your appointment early.

After the Holiday?

  1. Take the week off! Trust me – your clients don’t need you for the week between Christmas and New Year’s!  Take that time and spend it on yourself and your loved ones!  You’ve earned it.

With a little bit of pre-planning, you’ll be breezing through the holiday.  It’s so much more enjoyable for everyone to be in a festive spirit instead of being the Grinch.  Put some effort into setting yourself up to enjoy the best of the season – it makes the time fly by.  And you might even get a few moments to relish this time of year!

We had a lot to say on the subject in this clip.  You can see the rest on Learn2GroomDogs.com!

Happy trimming!

~Melissa

click-here


error: Content is protected !!