Log InCartCall Now: (616) 667-7297

How Do You Remove Track Lines from a Coat?

I still remember how frustrated I got when I first started grooming.

eraserI was the assistant, doing mostly bathing and drying for the groomer. One day, she was overbooked and was falling deeply behind schedule. She had a basic “all trim” on a larger dog that she hadn’t even started yet. Out of desperation she asked if I would remove some of the coat before the bath.

I thought to myself, “Sure, why not? How hard could it really be?” I picked up the A2 clipper as the groomer handed me the appropriate head. I twisted it on and set to work.

What a mess. The dog wasn’t hurt but my work was awful. The dog was full of uneven coat and lots of tracking.

The groomer had always made it look so easy. Coat seemed to melt off like a hot knife through butter. Her clipper work was always smooth and even. No track marks. No sticky-outies.

This was not nearly as easy as I thought!

However, I stuck with it.

Quote In A CircleThe groomer coached me as I struggled with the second side. It turned out somewhat better but was far from perfect. Today, I would not consider my work that day as acceptable – not even as pre-work before the bath. It was that bad! Luckily, I didn’t have to worry about all the tracking. It was just the rough cut before the bath. Once the dog was clean and blown dry, the groomer finished it in no time.

Fast forward 10 years. I had mastered the clippers and figured out how to eliminate tracking in the coat. On rare occasions, I still had problems. By that time, I was in my own mobile grooming van and running my own business. One of my clients was a buff American Cocker whose owners wanted clipper cut.

Most of you who have been groomers for any amount of time know some buff-colored Cockers track terribly when clipper cutting. This dog was no exception.

It didn’t matter what blade I chose.

Tracks.

It didn’t matter how powerful the clipper was.

Tracks.

It didn’t matter what time of year it was.

TRACKS.

The. Coat. ALWAYS. Tracked.

On one appointment, I basically threw my hands up. I could not get the tracking out of the coat. I had used all the tricks I knew to no avail. As I sat there contemplating how to remove the lines, I had an idea. What would happen if I reversed a blade over this coat? Hmmm. At that point, I figured I didn’t have much to lose.

I tried out the technique on an obscure spot on the dog’s body. I reversed a #7F blade then stepped back to check my work. I realized it was going to be way too short. I bumped up to a longer #4F blade. When I tried again – it was perfect. It was the length of a #7 blade. And even better, it was baby butt smooth. Eureka!

Over the years, I’d figured out how to get all coat types super smooth, but this Cocker type coat had always given me trouble. Once I mastered that coat type, coat tracking was a thing of the past for me.

So how do you get coat super smooth without any tracks?

There is not one simple answer but there are lots of techniques and trouble-shooting options. Here are a few tricks that I discovered with years of practice.

Page 479 Ways to Eliminate Track Marks

  • You need super sharp blades. The sharper the blade, the faster and smoother the cut.
  • Get a powerful set of clippers. They don’t necessarily have to be large and clunky. They do need to have enough power, speed, and torque to glide effortlessly through a thick coat.
  • Use consistent speed when clipping through the coat. As you guide the clippers through the coat, you need to run the clipper consistently over the pet’s body.
  • Card thick and dense coats before AND after. Dead undercoat clogs clipper blades. Removing as much dead undercoat prior to clipping and then again after the clipping will greatly reduce lines.
  • Always follow the lay of the coat either clipping with the grain or against the coat growth. Cross coat cutting typically creates track lines. Focus on working with the natural lay of the coat.
  • Reverse blade clipping. When the coat growth pattern is distinctive, reverse clipping can be beneficial to remove or eliminate clipper tracks. Instead of working with the coat growth, work directly against it. Reverse clipping cuts the coat closer than working with the grain. Always bump the blade up two lengths longer – a #4F cuts the length of a #7F with the grain.
  • Maintain a consistent degree of tip on the blade as you clip. Every clipper blade works most efficiently when the heel of the blade is tipped up slightly. The shorter the clipping action, the higher the degree of tip.
  • Keep consistent pressure against the skin as you clip. Typically, the weight of the clipper is the correct pressure to apply. Keep a supple wrist as you guide the clipper over the pet’s body.
  • Fine detailed thinners work as erasers on stubborn lines. When all else fails, you can buffer clipper lines with thinning shears, knocking off just the high points of the tracks.

Every coat type is a little bit different. Some coats barely track at all. Others are almost impossible to get smooth. Learning how to minimize tracking takes time and practice. Mastering a smooth clipper cut in the least amount of time takes focus and attention to details.

There are a lot of moving parts when it comes to mastering clean perfect clipper work. Groomers who have mastered a track free simple “All Trim,” on a regular small to medium-sized can groom a pet in one hour or less.

If you struggle with this problem, my book, Notes from the Grooming Table, has a very detailed section about clipper work in the front of the book. My Learn2GroomDogs.com streaming video platform also has some great videos about efficient clipper work in the Core Video Category. Make sure to check out those two educational resources. If you work with a team of stylists, someone within your group might be able to coach and mentor you. You can also look for local clinics or workshops where you can work with a seasoned professional.

Happy trimming!

Melissa

 MVpaw_no_Inner_whiteWhat are the tricks you’ve used to eliminate tracking? Jump on the Learn2GroomDogs.com Facebook page and tell us about it.


How to Get Your Clipper Work Smooth – Like a Summer Hay Field

blogrIt’s been over 35 years since that first time. I still remember standing in awe, watching a talented pet groomer give a dog a haircut. She handled her clippers with ease. The long fur fell away like a hot knife through butter. The end result was smooth and gorgeous. And she was fast – super fast. She made the whole process seems so simple.

The first time I tried, I quickly discovered it was not simple. Those initial attempts were pretty pathetic. Saying my first efforts were rough and choppy would be polite. There were long tufts hanging out everywhere. I was frustrated beyond belief.

I was determined to master the skill. After all, the groomer I had been watching proved it could be done. It was simple – I just had to focus and figure it out.

Fast forward a few years of practice and a couple hundred dogs later, and I could make any dog look amazing. When I did a simple haircut on a pet, the fur fell away like a hot knife through butter. The end result was smooth and appealing. I could finish dogs in no time. I’d gotten very efficient with my clippers.

It took years of hard work. There were years of standing on my feet until they throbbed, working until my hands and shoulders ached. However, my pain can be your gain. Here are a few tips to enhance your speed when it comes to simple, low maintenance haircuts:

  • Use the most powerful clipper you can afford and are comfortable holding. Duel speeds or variable speed clippers are great options.
  • Work with the natural lay of the coat. You can work with or against the grain. If you reverse clip, the end result will leave that fur approximately two blade lengths shorter than working with the natural lay of the coat.
  • For a large majority of low maintenance trims done with a #4F, #5F, or a #7F blade with the grain, you will go over the pet three times before it’s really smooth.
  1. The first time removes the bulk.
  2. The second time takes out the high spots.
  3. The third time erases what you missed.
  • The strokes are long and smooth. They overlap slightly. I often tell students to think about a hay field. The farmer wants to be as efficient as possible – but he doesn’t want to miss anything, either. Most farmers work in nice, neat rows as they cut hay, slightly overlapping each row to ensure they don’t miss any portion of the field. Think about the dog’s body in the same manner. It’s a hay field. Your clipper is the tractor. You want it done right… and you want to be done before the dinner bell rings.
  • When clipping the legs, remember the actual contact of the cutting blade is minimal due to the shape of the surface. It’s round – like a pencil. Only a few teeth will make contact with the surface as you run the clipper down the leg. Thus, on legs you need multiple passes to get the same effect as three passes on the larger flat surface of the body. You can clearly see this relationship by simply running a blade down your own finger and looking at the blade’s point of contact.
  • Back brush. Back brush. Back brush!

clippersYou’ll always get a smoother cut on a dog that is clean and the coat has been fluffed. Once you make the initial pass to remove the bulk of the long coat, it’s time to pick up the brush. Back brush the entire dog and go over it a second time. On the third pass, again gently back brush the entire area that needs final attention. Did you get that? Back brush!

When do you know you are done? You are done clipping when there is no more coat coming off the dog after it has been washed, dried, and effectively back brushed. Period.

Clipper work on a low maintenance haircut style can be extremely frustrating for new groomer. But once you master the clipper and understand how to work with the coat, it becomes second nature. It becomes simple. You become fast. And you will be able to perform the haircut safely with great precision.  You can do it. It just takes focus

Happy trimming!

Melissa

 MVpaw_no_Inner_whiteWhat did you think about these ideas? What do you do that works great for you? Jump on the Learn2GroomDogs.com Facebook page and tell us about it.


The Secret to Handling Challenging Dogs

Dollarphotoclub_57676672In my years of teaching new pet groomers, I’ve seen hundreds of dogs take advantage of a new students. Dogs pull, squirm, whine, snarl… and bite. I’ve seen many students frustrated to the point of tears.

Then a miracle happens.

An instructor will walk over to the pet and gently take over for the student. Suddenly, this challenging pet turns into a perfect angel. The students’ jaw drops. A moment in stunned silence passes before the student exclaims, “How did you do that?!” The answer is simple:

Energy.

Dogs have keen senses and an uncanny ability to pick up on our energy and our confidence. They read us clearly even when we don’t think we are connecting to them. In the example above, the dog picked up on the instructor’s energy without a word having to be said.

Dogs are primarily nonverbal communicators. They have a language of their own. They are very clear in the messages that they give us. It is up to us to be able to interpret that language.

The #1 rule when working with pets is to remember the three C’s. As a professional you must remain: Calm, Cool, and Collected in ALL circumstances. The second you step out of this energy mode, the dog pet will know it.

Dogs are hardwired to think like dogs. They need a pack leader. If you do not exude the three C’s, dog language translates that to “poor leader.” The pet will not follow you. It will not cooperate with you.

So how do you gain the upper edge in this situation? Believe it or not, it all starts with your BREATHING.

I know it sounds far-fetched. How could something we do without conscious thought help in this situation?

To create a calm, cool, and collected energy, you need to be cool, calm, and collected. Deep breathing allows you body to channel that calm and focus. To make it happen, your breaths need to be deep and saturating. Breathe in slowly and deeply through your nose. Draw in the air and feel it fill your lungs. Now exhale slowly through your mouth. The most important part of deep breathing is to regulate your breaths. Three to four seconds in. Three to four seconds out.

Try it. You will feel the oxygen saturating your body. Tension begins to leave your shoulders. You will start to feel more relaxed almost immediately.

Screen-Shot-2015-11-05-at-4.08.52-PMDeep breathing can release stress and provide other noticeable health benefits. You will likely feel calmer after performing deep breathing exercises, and may trade feelings of anger or fear for a focused, relaxed state of mind. Most dogs will totally gravitate to this energy in a very positive way.

I firmly believe that 98% of all dog bites are preventable by reading the animal correctly and taking the appropriate precautions to protect yourself while gaining humane control over the pet. Your hands are your livelihood. You must take utmost care not to let your hands become injured.

Every pet is an individual with different physical and emotional characteristics. Some dogs receive clear directions and boundaries at home, making them very easy to work on in a professional setting. Other pets will not have the skills necessary to be well-mannered candidates in a professional grooming setting.

The personality quirks that you’ll experience while working professionally with pets will range from dogs that are perfect angels, to dogs that are mildly annoying, to dogs that could be potentially dangerous to work on for both the handler and to the pet itself.

Whenever working with pets it is always critical to remember the 3 C’s. As a professional you must remain calm, cool, and collected in all circumstances. And don’t forget to BREATHE.

Whenever you have a dog on a table or in your grooming facility, you must use humane, respectful, and consistent training messages. The more you can learn about dog psychology and combine it with actual experience, winning the control and the respect over the dogs will become second nature.

Always remember that dogs are primarily silent communicators. Excessive talking or giving of commands is not necessary to effectively communicate with them. Much of your control can come from maintaining the Three C’s – Always remain Calm, Cool, and Collected while working with any animal.

Any time you feel you are losing control of the three C’s, it’s time to step away from the grooming table and take a break. Breathe. Only when you can totally regain your composure is it time to step back and begin your work again.

There are many videos on Pet Handling in the Learn2GroomDogs library. Also my blog on Rating Dog Personalities is very helpful when determining how to rate personality and behavior in dogs.

Happy trimming!

Melissa

 MVpaw_no_Inner_whiteWhat did you think about these ideas? What do you do that works great for you? Jump on the Learn2GroomDogs.com Facebook page and tell us about it.


I Want a “Puppy Cut”

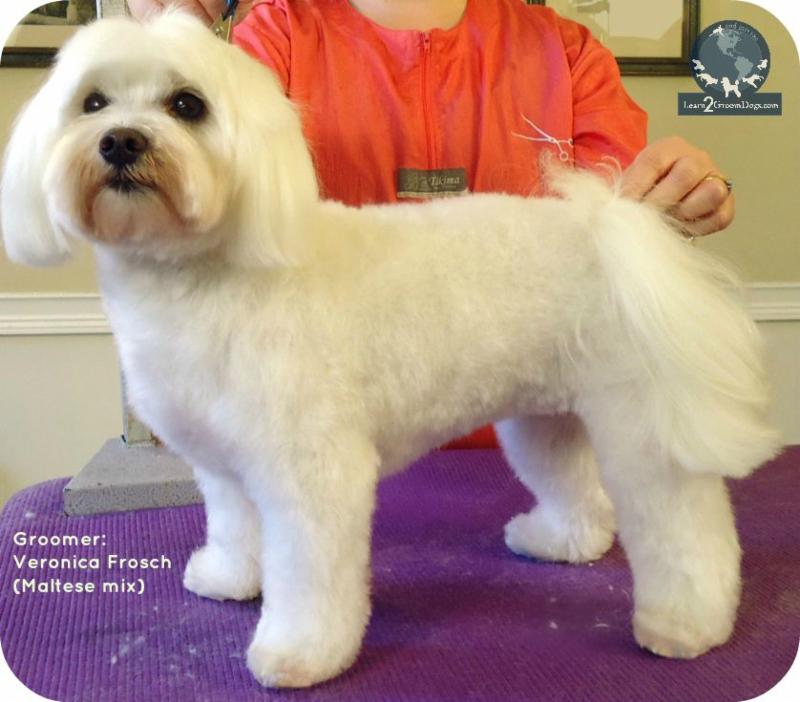
Don’t you love it when an owner walks into a salon and ask for this trim by name? They actually think this is a universal standard trim that all groomers and pet stylists should know how to do. When we start asking them questions, they get all huffy, thinking we don’t know how to do our jobs. Frustrating!! You and I know there isn’t a consistent right way to do a “puppy cut.” There are many – many variations!

The puppy cut is one of the most popular haircuts. It works well on a wide variety of pets. From Shih Tzus to Doodles. From Pomeranians to Bichons. Almost any breed that grows longer coat can be done in this easy-to-care for style.

Yet, the puppy cut is also the most misunderstood haircut in grooming salons around the country. Why? There are no clear directions of what this trim actually is or how it should be done. It’s left up to individual personal interpretation by owners, groomers, or talented pet stylists.

The puppy cut started out as a trim style for Poodles. The puppy cut is a specific trim used on young Poodles in the dog show world. Once the puppy turns a year-old, they are put into the elaborate adult haircut for the conformation ring.

Today, the term “puppy cut” is used very loosely. It can apply to a wide variety of different breeds. It’s highly adaptable to any size of dog. Coats can be curly, wavy, or straight. Almost any purebred or mixed breed that grows hair looks appealing in a “puppy cut.”

quote 2 Many owners love this style of trim. It can be very cute. It’s easy to care for. It’s highly versatile. That’s a win-win-win for any busy family! The dog does not drag in dirt and debris from outdoors. Their ears do not drag in the food or water dish. The need for brushing between grooming appointments is minimized. And on smaller pets, bathing between grooming appointments is a breeze. When done well, it can be extremely attractive, to boot.

So what is it?

Essentially, the puppy cut is one length all over. The most common length is between 1-2 inches over the body, legs, tail, head, and ears. Typically, it’s done with a clipper fitted with a long guard comb over the blade. There should not be any clipper marks, uneven coat, or sharp edges left in the fur. Next to a powerful clipper, high quality blenders are your best friends when doing this trim. Everything is soft and plush, like a fluffy puppy.

The term “puppy cut” can be tricky. In some circles the puppy cut can also be known as the “teddy bear trim”, “summer cut”, or “kennel cut.” I’ve even seen some salons turn their version of the trim into their “signature haircut.” So the puppy cut becomes “The Posh Pet Special” (brilliant marketing by the way!) Generally, the only things that change between theses trims are the names and the length of coat.

It’s important to keep this in mind, too: one person’s interpretation of a puppy cut might be that of a smooth-coated puppy. Think Boxer, Pug, or Beagle. Another person’s interpretation would be that of a fluffier breed like a Shih Tzu, Bichon, or Poodle. There’s also a big difference between a four-week old puppy and a ten-week old puppy in terms of coat growth.

With all these interpretations, there is a wide variance of what each individual dog will look like and what each owner expects their dog to look like. If an owner is requesting this trim for the first time, be prepared to discuss the trim in detail with the owner. DO NOT ASSUME YOU ARE BOTH ON THE SAME PAGE! Communication is the key to a happy customer.

Here is a great tip to remember when talking with clients: whoever is asking the questions controls the conversation. As groomers and pet stylists, we are problem solvers. Uncover the problems in five simple steps.

  1. Observe the pet as the client walks through the door. Let common sense guide your line of questions.
  2. Find the problem. Ask basic questions like, “Were you thinking of a short and smooth style or something a bit fluffier?” Letting the client talk will help uncover problem areas.
  3. Gather clues from what the client tells you and what you observe.
  4. Offer limited choices as you help the client solve the problem.
  5. Guide the questions in five areas of the pet: overall body – head – ears – legs/feet – tail.

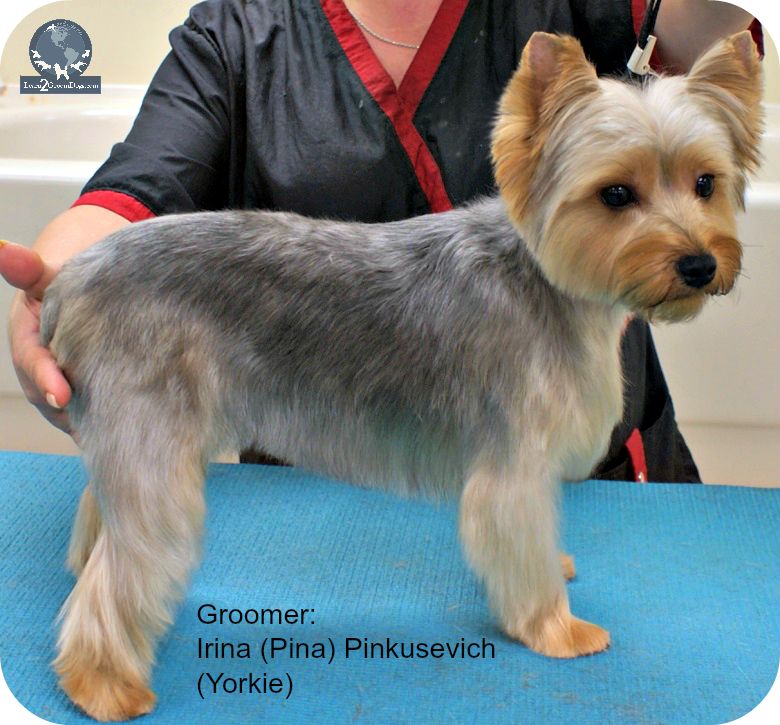
Here is a list of talking points when a new client request a “puppy cut.”

  • In general, what is the look they are hoping for? Something smooth and sleek so it’s easy to care for? Or something that makes the dog look slightly fluffy, plush, and super cute?
  • What is the lifestyle of the dog? Active? Sedentary? City dweller? Enjoys outdoor activities?
  • What is the texture and coat density of the dog? Fine, thin coats will looks shorter than dense coated dogs even with the same length clipper blade.
  • How much length do they want left on the body? What about on the legs? Feet?
  • What type of head style would they prefer?
  • Depending on the pet’s ear set, ear styles can change dramatically (dropped ear or pricked and pointed). How do they want them styled? Long? Short? In-between?
  • Do they want a long coat left on the tail or trimmed down to match the body? Or something in-between?

It’s important to have a thorough conversation with the owner when considering this haircut. There are so many variances with a puppy cut. Simply having the client state they want one is not specific enough.

Advise the client about trim options that would work best for their dog. Based on the condition of the coat and your pet’s body structure, you will be able to offer some valuable suggestions. A skilled pet professional will know how to make minor changes to the trim enhancing the pet’s appeal. Maybe the pet’s coat is too tangled to do the longer trim today. You’ll be able to suggest alternatives on how to modify a trim that works best as you discuss options for future trims.

Educating clients on proper pet hygiene is a valuable service most salon offer for free to their clients. In order to keep the dog looking its best, you can advise the client on how to best maintain this haircut between grooming appointments. At home brushing and bathing can make a big difference in how they look and smell, too. You can also make suggestions on how often the trim should be done based on the pet’s life style and coat texture. Maybe you suggest they get a full haircut every 4-6 weeks. Or maybe a maintenance program would be better suited for the client when you see them for weekly or bi weekly appointments.

Always remember, your clients are the lifeblood of your business. Taking a little extra time up front for a warm and welcoming pet consultation will go a long way toward building a solid relationship with them.

There is a good reason why the “puppy cut” is one of the most popular trims in grooming salons around the country. There are many – many variations!

What is YOUR first thought when you hear this term? How do you address this issue?  Jump over to the Learn2GroomDogs.com Facebook page and tell us about it!
Happy trimming,

~Melissa

P.S. You can make this and ALL grooming conversations easier and more successful.

This is a great tool tool for getting the conversation started in a way that is easy for you to explain and for the client to understand. The photos and drawings make it even simpler! Try it the next time you talk to your guests. Even better? Use this as a teaching/training tool for your staff so you are all consistent in the ways you speak to your clients. Once everyone on your team knows how to discuss the essential parts of the pet, they’ll sound more knowledgeable, your clients will feel more comfortable, and you’ll waste less time (and possibly profits) correcting “guess work!”

Thinning Shears are the Pet Stylist’s Eraser

Are you thinking about upgrading any of your pet grooming tools? For many dog groomers, The Groom Expo in Hershey, PA that is coming up later this month is a perfect time to see and test new items for your tool kit. If you are saving your tip money to buy new thinning shears, this blog is for you!

pencilThinning shears (or blending shears) are the best-kept secrets in the grooming world. Used properly, they can make mistakes much less noticeable. For a new stylist, this is one of the first shears I always recommend upgrading in your toolbox.

It doesn’t matter how long you’ve been grooming or how talented you are as a pet stylist – sometimes you just need a little help. An “oops” can occur at any time. Mistakes happen.

Maybe there is a spot on the coat that you just can’t get smooth. Maybe there is tracking in the coat from the clippers or guard comb. You may have left scissor marks in the coat – or a hole in the coat you accidentally made with clippers or scissors. You might even be working with a dog that will not hold still long enough to work safely with clippers or scissors – leaving the coat rough and jagged.

Thinning shears can be your savior. They erase rough spots. They blend out jagged edges. They smooth out transition areas. They fix mistakes.

The difference between a good stylist and a great stylist can be determined by how much value they place on their blending shears.

ToolboxStylists that understand the value of this type of shear will invest in multiple pairs. Just like straight edge shears, there are wide varieties from which to choose. Some are for more general use while others have more specific usage. The key is to know how you want to use the shear. Do you need it for light wispy coats? Drop coats? Terrier styling? Working around the head or eye area or dealing with large surface areas? There is a blender to fit every single one of these needs.

I always suggest you personally try out thinning shears before you purchase them. Just like Colin Taylor says, shears are like shoes. You need to find the ones that fit you! They have to fit properly as well as cut smoothly and run effortlessly in your hands.

So how do you narrow down your choices? Ask. Find out what other groomers and stylists are using. Determine which thinning shears they rely on every day in their salons. Believe me, they have opinions! There are lots of fabulous thinning shears out there – but there’s also a lot of junk.

Most high quality blending shears will have an average cost of $150 – $350. Of course, you can spend more if you like. Your equipment is an investment in your career. You may not need the Rolls-Royce when you first start out – but you do need something that is reliable and dependable. Luckily, there are many styles and varieties from which to choose.

royale-double-teeth-thinning-shear-bladesThe difference between a good stylist and a great stylist is that they know how to fix mistakes. Every one of us makes them. Having a nice collection of thinning and blending shears will be the erasers you need when that “oops!” happens.

What are your favorite shears? What do you look forward to shopping for when you go to Hershey? Jump over to the Learn2GroomDogs Facebook page and tell us about it!

Happy trimming!

~ Melissa


The Pet Grooming Field – Do You Know Where Do You Fit?

Discovering the Meaning Behind the Job Titles

Groomer.

I have always struggled with this word. Stop and think about it. Is it really the best definition for the wide variety of skills necessary to do our job? Personally, I think the term “Groomer” is too broad a term to use within our field.

Think about how the medical profession is organized… when you need a routine annual medical exam, do you book an appointment with a Podiatrist? No. You’d get an appointment at your regular clinic, where they deal primarily with routine and preventive health care. Depending on your condition, you might get an appointment with a nurse practitioner who is qualified to treat a certain spectrum of illnesses. For situations requiring more formal training and experience, you’d see your family doctor. If a health disorder required attention from an expert in a particular field of study, you would seek the help of a specialist.

Another point to ponder… how do you think their pay scale is structured? I would bet the medical specialist takes home a much larger paycheck than the nurse practitioner or even the family physician.

Let’s flip this over to what we do. Bottom line – we’re pet specialists with three distinct skill levels:

  1. Bather, Assistant, or Bathing Technician
  2. Groomer, Pet Groomer, or Grooming Technician
  3. Stylist or Pet Stylist

Here are my definitions for each of those areas.

1. Bather, Assistant, or Bathing Technician

These folks have a basic knowledge base of core grooming skills. In some cases, the Bather’s duties may cross over into other job descriptions. In many smaller salons, the Bather might act more as a personal assistant to the Groomer or Stylist. A Bather’s duties might include any task that could be easily delegated by the Groomer or Stylist so they can focus on getting dogs completed in a timely manner.

Bathers, Assistants, and Bathing Technicians should have a basic understanding of:<

  • Selection and Care of Equipment
  • Canine Psychology and Temperament
  • Safety and Sanitation
  • Anatomy
  • Pet Handling
  • Breed Identification
  • Skin and Coat Conditions
  • First Aid and CPR
  • Parasites and Their Control
  • Diseases and Preventive Vaccination
  • Nutrition
  • Common Illnesses and Skin Disorders
  • Common Grooming Products
  • Equipment Handling
  • Coat Pre-Assessment and Pre-Work
  • Bathing and Drying Skills
  • Brushing and Combing Skills
  • Mat Anatomy and Safe Removal
  • Equipment Handling
  • Nail and Feet Trimming
  • Ear Cleansing
  • Tooth Care
  • Anal Gland Expression (Optional)

Although the Bather role in a busy salon is typically considered an entry level position, in reality it’s one of the most important roles of a successful salon. If a dog is not washed perfectly and dried properly, quality work can never be achieved. No matter how talented the Groomer or Stylist is when it comes to trimming and styling pets, they will never be able to do a good job on a dirty or incorrectly dried pet. Period.

Earning Potential – Entry Level

2. Groomer, Pet Groomer, or Grooming Technician

A Groomer deals with basic grooming needs. They can get dogs clean, dried properly, and thoroughly brushed out. They can do everything the Bather does but they kick it up a few notches. Groomers can complete challenging bath and brush pets with ease. Plus, they can trim pets safely and efficiently with clippers. Groomers are comfortable with a variety of clippers and blade choices. They can handle a wide range of coat types on both bath and brush style pets as well as simple, low maintenance haircuts. They have basic knowledge of how to work with scissors and blenders, getting adequate results for non-discriminating clients.

Pet Groomers should have advanced knowledge and understanding of the previously mentioned areas and be able to work with greater speed and efficiency without sacrificing quality and safety.

The Groomer in almost any salon is the workhorse. They focus on non-nonsense, low maintenance trim styles. Their concentration is on getting the dog thoroughly brushed out, mat free, and super tidy. Trim work focuses more on the neat and clean aspect of grooming than creating highly stylized haircuts. Advanced training and continued education in this area can vastly improve grooming speed, quality, and enjoyment of the job.

Earning Potential – Mid-Range Level

3. Stylist or Pet Stylist

A Pet Stylist molds and shapes the coat in a manner that accentuates the features of the pet. They have a firm understanding of anatomy, breed profiles, as well as structure and movement. They have a firm comprehension of technical skills. An accomplished Pet Stylist can apply those skills in an artistic manner. Their personal tools are of the highest caliber, allowing them to create remarkable trims in a very short amount of time. A seasoned Stylist will often also specialize in particular breeds, grooming techniques, or personality types.

Pet Stylists should have expert knowledge and understanding of the previously mentioned areas, be able to work with greater speed and efficiency without sacrificing quality and safety, and have expert control of clippers, shears, combs, brushes, blades, and stripping knives.

Serious Pet Stylists are generally highly motivated. They advance their careers through continued education. It’s common for an aspiring Pet Stylist to seek out many forms of advanced learning. Many of them turn it into a personal goal or an enjoyable outlet. Conformation dog shows, grooming trade shows and competitions, certification testing, books and magazines, videos, clinics, workshops, private coaching and training, and canine trials are just a few areas the motivated Stylist can use to ramp up skill levels.

Earning Potential – Highest Level

The term “Groomer” is just not descriptive enough. It just doesn’t cover it all – especially if you wear multiple hats in your salon like Receptionist, Accountant, and Cleaning Crew. When a business starts to grow, layers of expertise will develop within your team.

Just like in the medical profession, the more you learn, the more you earn. The stronger your knowledge base and the more proficient you are, the more money you’re going to make. And knowledge has a wonderful side effect – confidence. Why not take steps toward building your skills and confidence every day?

Using a generic term like “Groomer” just doesn’t work for me. I bet it doesn’t work for you, either. Jump over to the Learn2GroomDogs Facebook page and tell us what woks best for you!

Happy Trimming!

~ Melissa


3 Things You Need to Know to Groom Any Breed (What You Need to Do If a New Breed of Dog Lands on Your Grooming Table)

It’s a day like any other when you get a phone call from a client:

“I have a (insert breed here). Do you know how to groom them correctly?”

Um…

You’ve never groomed this breed before. In fact, the closest you’ve come to one is seeing it at a dog show. Maybe you’ve never even heard or seen the breed before.

“Why yes, Mrs. Jones, we certainly can make your Bedlington look like a Bedlington!” you say confidently as you book the appointment for the following day.

You hang up the phone and reality sets in. You’ve never seen this type of dog cross your grooming table. You don’t have a clue how to actually groom it correctly. What do you do?

The first thing I would tell you is – don’t panic!

Here are three core strategies you need to groom any breed of dog.
 

  1. Have strong technical skills. If your clipping, guard comb work, scissoring, blending, and basic hand stripping skills are good, you should be able handle this without much of a problem.
  2. Have a solid understanding of canine anatomy. If you understand how bones and muscles create a sound dog, it becomes even easier.
  3. Know how to translate a breed standard. If you can interpret the written breed standard into a visual, you’re golden.


So what is your next step? How are you going to be confident when that client walks in the door tomorrow?

Your next step is to look up the breed in reference books. If you have an American Kennel Club (AKC) Complete Dog Book (or a similar book from your country), start there. This will give you the official breed standard. Review the breed profile. Read about the history of the dog to gather clues about the dog. After a quick scan, you I have a good idea of the size, temperament, and structure of this new dog. Most books will also have photos that accompany each breed. If you don’t have an official breed standard book handy, you can always look it up online.

Once you have become familiar with the breed itself, take a look at your grooming books. Review the instructions. Compare the instructions to what you have read and saw in the breed standard.

The Internet is an invaluable research tool. Use it wisely. Most breeds will have a parent club that hosts an official site for the breed. Spend a few minutes reviewing images of top winning dogs in their galleries. With a little luck, you may even find grooming directions or links to grooming directions from dedicated breeders.

As groomers and stylists, we are a visual bunch. “A picture is worth a thousand words.” This is so true for us. I love to do Google image searches of breeds I’m not familiar with. Here’s a tip to finding good images. When you enter terms in the search bar, add keywords like: AKC Champion Bedlington Terrier or UKC Champion Fresian Water Dog. There is a big difference if you type into your search engine, “images of Miniature Schnauzers” verses “images of AKC Champion Miniature Schnauzers.” You will pull up a WIDE assortment of images. Some will be great. Others not so great. Some will be worthless. And others will be totally off the mark. You need to have enough knowledge to filter through the images, finding the best images to suit your needs.

Use a little caution when looking up information online. Always remember – not everything posted on the internet is correct or presents the best image of a breed. Make sure you use all your resources to gather the most accurate information possible.

3672638_lWatching videos on the breed in question is also a great option. Again, a word of caution – not every “how to video” on the internet will be beneficial. Today, anyone can post a video online. Unfortunately, there is a lot of poor quality grooming being featured – especially if it is free. Go to trusted sources like Learn2GroomDogs.com that are truly qualified to demonstrate how to groom a particular breed.

Yes, you need to do a little research. Will it require a little effort? Yep.

However, if you have those three nuggets of knowledge, you will have the foundation skills to groom any breed.

  1. strong technical skills
  2. solid comprehension of canine anatomy
  3. ability to interpret the breed standard

With those 3 skills, you can groom any breed of dog that comes your way.

If you are a newer stylist or just don’t have the time to do all the research, there is a shortcut. Notes From the Grooming Table will allow you to fast track your knowledge. Simply grab the book and turn to the breed you have a question about. We are just about to release the fully updated Second Edition of Notes From the Grooming Table. Keep your eyes open for how to get this revised edition – announcements on how to get yours will be available soon.

As pet groomers and stylists, we get to see plenty of dogs. It’s rare and exciting to get a breed you are not familiar with. Most of us pros enjoy the challenge of learning about a new breed. Figuring out what we will need to do to make the dog look like it should – or could – look like if the owners allow you to groom it correctly.

I know, I know… many owners just want the hair shaved off once they walk through your door. Or the dog is in such poor condition, the only humane option is to shave the coat off and start over. That’s always a disappointment once you’ve put in effort to educate yourself. Hopefully, the new client motivated you to learn few new things you can add to your knowledge toolbox even if you didn’t get to execute the trim!

Happy Trimming!

~ Melissa

P.S.

Did these tricks help? Go online and tell us what you think on the Learn2GroomDogs Facebook page.


Westminster Dog Show: What I’m Watching For This Year

1rrFebruary is Westminster dog show month! It is one of the few dog shows getting full national TV coverage at the Groups and Best In Show levels. I look forward to it. Every. Single. Year.

I will be parked in front of my big screen TV for both nights watching and studying.

This year I’m even more excited. The 140th Westminster Dog Show is coming on the heels of a two-day advanced grooming session we just filmed for Learn2GroomDogs.com.

Master pet stylist, Irina “Pina” Pinkusevich, was our guest Training Partner. Guess what? Just three years ago she won the prestigious Groomer of the Year Award which was presented at the Westminster Kennel Club Dog Show. She worked on six different dogs, all in show trims:

  1. Miniature Poodle in a Continental Trim
  2. Kerry Blue Terrier
  3. Bichon Frise
  4. English Setter
  5. English Springer Spaniel
  6. American Cocker Spaniel

Pina is one of the most advanced educators in our field. Every time I see her work on a dog, I learn something. These lessons were no different. What I especially love about Pina is that she has the inside scoop. She knows the hot styling trends and/or the direction they are going from the conformation show ring.

If you are focused on expanding your career as a high quality pet stylist, it’s more than just washing and knocking the hair off pets. It’s about anatomy. It’s about geometry. It’s about balance. It’s about style. It’s about bringing out the best of a dog based on its written standard. It’s about creating artful illusions. The art of pet styling is sculpting fur.

With every L2GD film shoot, I take detailed notes. With Pina, I find it challenging to keep up. My fingers never stop on my keyboard as I watch her work. I always walk away with loads of notes from her lessons.

Here just three takeaways that I learned from Pina two weeks ago. As I watch this year’s dog show, I will be noticing how these particular trends apply to the dogs in the ring on Monday and Tuesday nights.

Takeaways From the Learn2GroomDogs.com Film Sessions with Irina “Pina” Pinkusevich

Number 1: The ⅔ to ⅓ Rule

I’d never heard this rule of balance, style, and proportions before. Pina said when a dog is in properly balanced, the ratio is ⅔ to ⅓. Two-thirds makes up the front section of the dog. One-third makes up the rear of the dog. When trimming, the tuck-up or front jacket will be placed at the dividing line between the ⅔ and ⅓ points to create proper balance on a dog.

To test the theory, we pulled a number of images of top winning show dogs.

Dang!

There it was there over and over again. I also pulled images of the gorgeously groomed dogs Pina has done for Learn2GroomDogs.com.


Yep… the rule holds true on all of them, too.

This rule might be a new concept to many of us, but it’s been put into practice in the conformation ring for quite some time.

I will be watching to see how this rule plays out on the big screen at the dog show.

Number 2: The Lowest Point on the Throat is Level with the Topline or Loin

What??!

The throat is level with the topline? Seriously? This one caught me off guard. But then I started looking. Really looking. Sure enough. There is was over and over again. It especially held true on the Sporting dogs.

OK, I get it. Level with the back but what if you have a dog with a “sloping topline?” Now where do you take the point of reference from? The loin. It’s the point just in front of the hip bones on the top of the back. Draw an imaginary line from that point level and straight forward to the throat. That’s the lowest point on a clipped throat.

“Huh…,” I thought as I raised a questioning eyebrow. I will be on the lookout for this new grooming development. I saw how the rule held up in the Sporting dog images we pulled – but would it hold up to other breeds in different groups as well? I can’t wait to see how many Sporting Dogs utilize this “rule.” Trust me – I’ll be looking!

Number 3: Use the Front Pastern as a Guide When Setting the Undercarriage on Well Coated Dogs

Really?!

There is a point of reference when setting this line? Who knew? Certainly not me! I would just eyeball it and pray. My guess is I’m not the only one out there who has used that technique.

This principle applies nicely to many of the Setters and some of the Spaniels in the Sporting Group – as long as they have long enough furnishings to pull it off.

I’ll be keeping my eyes peeled to see if this third rule applies to other breeds, as well.

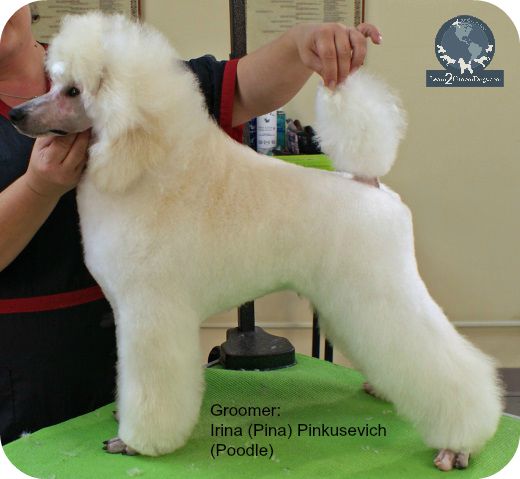
We had many more aha! moments while we watched Pina work her magic on these six lovely dogs. We will be releasing Pina’s latest L2GD video lessons all through 2016.

The three points I chose to outline here are all points I’ll be looking for closely as I watch this years televised Group and Best in Show classes at the 140th annual Westminster Dog Show.

People say to me all the time, “But I only groom pets… I don’t need to know how to groom show dogs.” You know what? I only groomed pets, too. But that never stopped me from learning as much as I can about what different breeds SHOULD look like. If you don’t have any reference as to what a nice representation of a breed looks like, how are you going to know how to bring out the best of any purebred or mixed breed?

Watching a dog show of this caliber keeps me fresh and excited. Watching top stylists at work, like our Training Partners with Learn2GroomDogs.com does, too. I hope you will join me as I hunker down Monday and Tuesday night to watch the show. I know I’ll have a pencil and paper close by to take notes!

February 15 and 16, 2016 marks the 140th Westminster Kennel Club Annual Dog Show. There are 199 breeds and varieties are eligible to compete. For 2016, there are nearly 3,000 dogs entered. For more information on the dog show, streaming or television schedules go to: http://www.westminsterkennelclub.org/

Happy Trimming!

~ Melissa

P.S.

Did these tricks surprise you? Go online and tell us what you think on the Learn2GroomDogs Facebook page.


The Importance of Canine Anatomy

“Why bother learning about canine anatomy?” is a phrase I hear all the time.

If you are a “professional groomer,” this is the most important lesson you can learn. Combined with effective pet handling, understanding canine anatomy is the FOUNDATION of all good grooming.

MV Skeletal StructurerrIf you don’t know how the pet is put together – or in some cases – SHOULD be put together, you simply won’t do a good job at your profession. You will not earn the trust and cooperation of a pets entrusted to you. So, whether you are a long time groomer, a newbie, or a bather working with a team of pet stylists – understanding canine anatomy is critical to your success.

All dogs, regardless of breed, possess identical bone and muscle structure. Fundamentally, all dogs – from Great Danes to Yorkies – are the same. The domestic dog is the end result of generations of carefully controlled breeding practices. Man has domesticated dogs to assist us in many daily functions.

Many breeds still do the jobs they were bred to do, such as herding, hunting or tracking. As times changed, the breeds remained but it was no longer necessary for them to perform these tasks. Other breeds have evolved a proficiency in other activities that allow them to continue to assist man.

For every purebred dog, there is a written standard developed by parent breed organizations that outlines what the “ideal” dog of that breed should be. The key to maintaining a dog in a condition to proficiently perform its original role is to know the standard.

lesson 1I get it. Being able to decipher the official breed standard can be challenging at first. Speaking the “language” is a key component to understanding how to work professionally with dogs. As I was coming up the ranks, I struggled with understanding the written breed standard, too. It was like Greek to me! However, with focus and intentional study, I did learn it – and so can you!

In order to safely handle a dog during grooming or to style the dog to accentuate its best features, you need to understand basic anatomy and individual breed standards.

  • What are the key components that make up a structurally sound and balanced animal, purebred or mixed breed?
  • How do you measure or select reference points?
  • How do you apply those points in the trimming process?
  • How can you handle or manipulate the dog to create a harmonious relationship?

For dogs with definite trim styles, you can accentuate proper structure while minimizing conformational faults. To the untrained eye, accentuating or detracting from the conformation of the pet will be subtle. However, it will make a large difference in the overall quality of the haircut.

Are you familiar with the dog’s natural movement limitations? If you are, you can make grooming much more comfortable for the pet. When the pet is comfortable, it is much more willing to cooperate. If you don’t understand the mechanics of a pet and try to move it beyond its physical limitations, you will eventually cause or contribute to an injury. Understanding key pressure points as well as using proper holding techniques allows both the pet and the stylist the greatest degree of safety through the entire grooming process.

Scottie FramworkrrTHE STRUCTURE OF A DOG: FRONT & REAR ASSEMBLIES

Front Assembly

This area makes up the shoulder and front legs. It consists of bones, muscles, and tendons. The angles of the bones, combined with their length, dictate how efficiently the dog will move. The shoulder blade is held in place by muscles and tendons that allow for good forward and back movement, but is limited from side to side. Some dogs are more limber than others. When lifting a foot or leg, never extend it beyond the point of mild resistance when the dog is relaxed.

Rear Assembly

Bones, muscles, and tendons make up the hips and rear legs. The angles of the bones, combined with their length, dictate how efficiently the dog will move. The pelvic and femur bones are held in place by a ball and socket that form the hip joint. The ball and socket offers a greater degree of rotation through the hip joint than in the front assembly. However, older dogs or dogs with joint discomfort will not be as flexible as a pet that is pain free. When lifting a foot or leg, never extend it beyond the point of mild resistance when the dog is relaxed.

Welsh Box StructurerrMEASURING A DOG: KEY LANDMARKS

Outline of a Dog

The overall length of a dog is measured from the point of shoulder to the point of rump and from withers to ground. The distance between the withers and the top of the elbow and the distance between the elbow and the ground will dictate the overall balance and proportion of a dog. Most breed standards refer to the body proportion as being square or rectangular.

Measuring the Head

Skull types come in a wide variety of shapes and sizes. The overall length refers to the points from the occiput to the tip of the nose. The stop area is frequently used as a key measuring point of the relationship between the length of topskull and the muzzle.

PATTERN SETTING

Pattern Setting

All patterns are set in relationship to bones and muscles on the dog. There are a few key areas about the neck, chest, shoulders, ribs, and thighs that allow stylists to set body patterns on the dog that are well-balanced and symmetrical. On the head, the key pattern-setting points are the stop area, eye socket rims, ears, cheeks, the back corners of the mouth, and the occiput.

Sporting Dog StructurerrWhether you are working on a show dog or a family pet, where you set the pattern will make a huge impact on your finished groom. On dogs with haircuts, pattern placement is critical to create a stylish haircut that accentuates the dog’s features in a positive light.

Balance, style, and flair all are seen at their best when a trim is founded on a sound basic knowledge of overall canine anatomy. Like anything else, the more knowledge one has on a topic, the easier it is to apply. With time, correct application will become second nature.

Happy trimming!

~Melissa

PS.

To learn more on this important topic, log in to Learn2GroomDogs.com and check out our video, Canine Anatomy!

Here is a preview

[youtube]https://youtu.be/iPBmW7nB0Qg[/youtube]


5 Steps for Setting Goals in Your Grooming Department

blogrrLast night I was sitting with Misty Fowler, our grooming department manager at one of my companies, Whiskers Resort & Pet Spa. It was our annual Christmas party.

Our conversation touched on the amazing growth that company had accomplished in the past few years. Misty beamed as she reported, “The grooming department is only $2,800 short of achieving our annual goal. And we still have the entire month of December to go!”

I was intrigued. She went on to explain how they did it.

A year ago she determined what she wanted for a growth rate in the grooming department. She figured out what that number would be based on the current year’s annual sales for the grooming department.

Once she had her annual target, she divided it by 12 to give her a monthly goal. Taking it one step further, she divided that monthly number by 4.3 to give her a weekly goal to aim for. Finally, she divided that weekly number by six to give her a daily target. She now had a clear road map. She, and her team, knew what they had to do to reach their annual goal.

blogAs we go into the early part of December, most grooming salons have a lull during these few weeks. This is a great time to set some goals for the following year.

Misty’s numbers were broken down annually, monthly, weekly, and finally daily. You can do the same thing for any financial goal you want to track.

Take a moment to think about what you want to do next year financially for your business and/or for yourself. Figure out a goal. Map out a plan. And follow the written road map to your goal.

So here’s the 5 step formula.

  1. Look at the previous year’s sales.
  2. Work out a realistic growth rate for your situation. Do it in a percentage format.
  3. Times last year’s annual sales by that percentage to come up with an amount. Add that amount to last year’s sales give you a solid goal amount to aim for. Take that total goal amount for the year and divide by 12. That will give you a monthly goal.
  4. Take the monthly goal amount and divide by 4.3, the estimated number of weeks in each month.
  5. Finally, divide your weekly amount by the numbers of days you work or your salon is open.

Now you have your own custom road map to follow to achieve your personal financial goals. Keep it in an area where you can see it all the time. Refer to it regularly to ensure you are on the correct path.

This is what it would look like if we put real numbers to the formula.

last year’s sales $100,000.00
next year’s increase target -8% 0.08
total amount of annual increase in dollars $8,000.00
total annual sales goal for following year $108,000.00
divide total annual sales goal by 12 months $9,000.00
divide total monthly goal by 4.3 weeks $2,093.02
divide weekly goal by 5 days for daily sales goal $418.60

(Note: if you take a two-week vacation and your salon does not stay open, drop the weeks to 4.2 for a closer calculation)

By breaking the numbers down to a weekly target, the easier it will be to follow. If you are wavering off the path, your daily and weekly targets will make it easy to recognize. You’ll be able to realign yourself before you go too far off base.

As Brian Tracy says, “Goals give you that sense of meaning and purpose, a clear sense of direction. As you move toward your goals you feel happier and stronger. You feel more energized and effective. You feel more confident and confident in yourself and in your abilities. Every step you take toward your goals increases your belief that you can set and achieve even bigger goals in the future.”

So what do you hope to achieve financially for your business or career next year? Take the time to set the goals and create a step-by-step map to achieving YOUR personal goals, today.

Here’s more from Misty from our YouTube channel:

[youtube]http://youtu.be/E1AvS2WH8ls?list=UU6QEPG7JG7exQRpEr9e_nHA[/youtube]

Happy Trimming,

~Melissa

click-here