Log InCartCall Now: (616) 667-7297

Blog

Dealing with Trouble Areas in Fur

SONY DSCMats. Tangles. Knots.

Call them what you like. That woven mess of dirt and hair can often determine what kind of a trim can be done on a pet. They are the best friend – and the worst enemy – of the professional pet groomer.

The key to dealing with these trouble areas is knowing how to identify them and deal with them effectively.

4 Types of Mats

1.) Lack of Maintenance: The owner brushes between grooming but it is not as effective or as often as it should be. Dirt, static, and moisture are usually the culprits. More frequent bathing and brushing to remove dense undercoat is needed in these cases. The mats produced from poor maintenance are generally smaller and can be removed with the proper knowledge, tools, and products.

2.) Neglect: These tangles are tough. Typically, these mats result of longer-term neglect and are very tight and difficult to remove. Many times, the dog’s coat is in extremely overall poor shape and is very dirty. They can be a hiding place for pests like fleas and ticks and may lead to skin damage or injury.

3.) Friction: Friction mats are caused when two areas rub together. It could be from a collar, dog sweater, or from a body part (like behind the ears or under the front legs) – but is not limited to those areas. Depending on the activity level of the dog, friction mats could be found up and down the legs, on long ears, or the tail. These are the areas that come in contact with other areas like tall grasses or even the ground.

4.) Compression: This type of tangle is generally found on the rear of the dog. It is caused from sitting or lying down. Dogs that shed heavily will have dead coat packed into the guard coat, and if not removed, will clump and mat as moisture and compression do their work. Just like people, dogs tend to be left or right-sided. The compression type density will be worse on one side more than the other.

Here is the best way to deal any type of tangle…

Find them before the client leaves!

That means at check-in. This is not just a time to be catching up with your client. Use this time to diagnose problem areas with their pet’s coat. Get your hands on the dog – not just your eyes! The eyes can be deceiving. The owner doesn’t even have to be aware of what you’re doing.

I disguise my hands-on inspection as a meet-and-greet to the pet. It warms up both the pet and the client. But more importantly, it gives me valuable information. Information that I can use to communicate effectively with a customer about the type of trim we can do, the cost, and the amount of time it will take.

Sink your hands deep into the coat. Keep moving. Feel under the ears, in the armpits – get to those friction and compressed areas so there are no surprises once you get the dog in the tub. Do you know what you’re feeling for? You’re trying to find patches of density/inconsistent density in the fur. You should be able to come into contact with the skin. Often, your client will insist that the dog is completely brushed out when in truth – they’ve just been brushing out the tops of matted areas. This is where your comb comes in handy for a demonstration. Sink the comb through the coat. If you feel resistance, that’s your matted area.

quoteRemember, the groom starts as soon as the client walks in the door, not when the dog is on your table. You should start assessing the dog visually as soon as the pet walks in and continue your examination until you are satisfied that you have found everything you need to discuss with your client before s/he leaves. Having to make repeated phone calls because you didn’t take the time to properly check over a pet will annoy your client – and will waste much of your own precious time.

But don’t stop there. You should always have a comb within reach. Clients may not always understand what a mat is, but it’s hard to deny a comb stuck firmly in the middle of tangled fur. It’s also a great way to open the discussion about the necessities of combing, as well as brushing, to maintain proper coat condition.

If there are problems or issues, I want to deal with them immediately before the client leaves. In the service-based business, education is the key. Most of the time, this means educating the client as to what is proper maintenance for their pet. Guide their hands to the problem areas. Have them feel for themselves what to watch for, so that when they’re brushing their pet at home they are better able to identify mats and how to deal with them. Many first time pet owners have really no idea what they’ve gotten themselves into when it comes to proper pet maintenance. They may love the idea of having a Golden Doodle, but have no idea that they should be groomed more than twice a year.

This is the perfect time to do that. With new clients, I would talk to them about trim options based on the condition of their pet. If their pet is in extremely difficult condition, I would talk to them about the risk factors the pet is going to experience due to its condition. Explain the potential risks that could occur during dematting. And always have the owner sign a pet release form (see examples from the Paragon School of Pet Grooming below). It also offers you an opportunity to offer beneficial special products or services to the pet or its owner.

By using your training, experience, and professional intuition, you can educate your client and make a real difference in the lives of the pets entrusted to your care.

~Happy trimming,

Melissa

66720

Client Check In Form

66720

Pre-Assessment Evaluation Form


This Little Gem is One of Your Best Marketing Tactics

There’s a secret to marketing your salon.  Do you want to know what it is?

~ Bows ~

Top secretThat’s right, bows.  Well-made, brightly colored, and altogether wonderful, bows.  The bow is your secret weapon and one of your best marketing tools.

“Seriously?!  I thought bows were just for decoration?”

Bows are a genius marketing tool.  They bring attention to your business.  In a nutshell, that little splash of color is doing your promotion work for you.
How?

The best part about this tip is that you already know the answer.  Look at this page.  What grabbed your attention first?  Was it the pictures?  The colorful text?  If so, that’s no accident.  The eye is naturally attracted to bright colors.

Beautifully groomed pets attract even more attention when they have a bright splash of color.  Applying bows as a finishing touch on a marvelous groom is a sure way to generate interest.

Getting attention is the #1 goal of any marketing campaign.  Beautiful bows do that in a fun and attractive way.

Accessorizing a freshly groomed dog can be a highly successful marketing opportunity.  Adding colorful bows to a pet can be the perfect way to get owners talking about your styling services any time others see them.

I learned this trick when I was very young, with our family’s first dog.

When we traveled, we’d send our Golden Retriever to a local kennel before we left.  When we picked her up, she’d always be freshly bathed and sporting a simple, felt fabric bow on her collar.  The bow color would change with the seasons, but this simple bow was there every time.

In our small community you could always tell when a neighbor had been traveling, because his dog would be wearing the same type of bow.  As we stopped and chatted, mixed in with the conversation would be the name of the kennel and how wonderful they were.

If that basic little bow had not been there, the kennel name would never have been mentioned, and a marketing opportunity would have been missed.

I carried these lessons of my childhood over into my grooming business.  Every dog that stepped out of my salon or mobile van had this bright finishing touch – unless the client requested otherwise – which wasn’t very often.

The bows were always subtle and stylish.  I used the seasons and holidays to dictate the color and themes of the bows.

Christmas and springtime bows were always popular.  At Christmas, we pulled out all the stops to add a festive sparkle and shine to the bows.  In the Spring, we made basic bows adorned with small silk flowers.  After a long Michigan Winter, this fun little bow lifted everyone’s spirits.

Successful people know that the difference between good and great is in the details.  Bows and finishing touches are part of the entire service package you offer to your clients.

Making attractive bows does require finesse.  It takes a bit of time to learn.  But once you figure out a method that works well for you, you will be limited only by your own creative spirit and time.

Many professional groomers and stylists use down time to create bows, in the same way that many people use knitting or crocheting to relax.

However, if basic bow tying just isn’t for you, there are many companies that specialize in wonderful, ready-to-use bows.  We encourage you to use them!

There are thousands of ways to market yourself as a professional pet groomer.  Choosing to accessorize a freshly groomed dog can generate lots of word-of-mouth advertising.  Adding colorful bows to a pet gets people talking about – and remembering – your styling services.

Isn’t it time you took advantage of the best sales tool for your business?

Happy Trimming!

~ Melissa

P.S.

Did this idea help? Go online and tell us what you think on the Learn2GroomDogs Facebook page.

To see videos on this topic, click here!


3 Things You Need to Know to Groom Any Breed (What You Need to Do If a New Breed of Dog Lands on Your Grooming Table)

It’s a day like any other when you get a phone call from a client:

“I have a (insert breed here). Do you know how to groom them correctly?”

Um…

You’ve never groomed this breed before. In fact, the closest you’ve come to one is seeing it at a dog show. Maybe you’ve never even heard or seen the breed before.

“Why yes, Mrs. Jones, we certainly can make your Bedlington look like a Bedlington!” you say confidently as you book the appointment for the following day.

You hang up the phone and reality sets in. You’ve never seen this type of dog cross your grooming table. You don’t have a clue how to actually groom it correctly. What do you do?

The first thing I would tell you is – don’t panic!

Here are three core strategies you need to groom any breed of dog.
 

  1. Have strong technical skills. If your clipping, guard comb work, scissoring, blending, and basic hand stripping skills are good, you should be able handle this without much of a problem.
  2. Have a solid understanding of canine anatomy. If you understand how bones and muscles create a sound dog, it becomes even easier.
  3. Know how to translate a breed standard. If you can interpret the written breed standard into a visual, you’re golden.


So what is your next step? How are you going to be confident when that client walks in the door tomorrow?

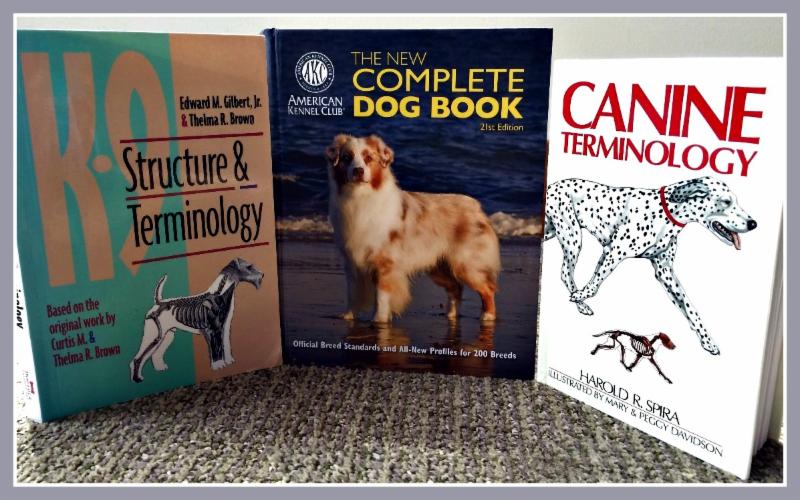
Your next step is to look up the breed in reference books. If you have an American Kennel Club (AKC) Complete Dog Book (or a similar book from your country), start there. This will give you the official breed standard. Review the breed profile. Read about the history of the dog to gather clues about the dog. After a quick scan, you I have a good idea of the size, temperament, and structure of this new dog. Most books will also have photos that accompany each breed. If you don’t have an official breed standard book handy, you can always look it up online.

Once you have become familiar with the breed itself, take a look at your grooming books. Review the instructions. Compare the instructions to what you have read and saw in the breed standard.

The Internet is an invaluable research tool. Use it wisely. Most breeds will have a parent club that hosts an official site for the breed. Spend a few minutes reviewing images of top winning dogs in their galleries. With a little luck, you may even find grooming directions or links to grooming directions from dedicated breeders.

As groomers and stylists, we are a visual bunch. “A picture is worth a thousand words.” This is so true for us. I love to do Google image searches of breeds I’m not familiar with. Here’s a tip to finding good images. When you enter terms in the search bar, add keywords like: AKC Champion Bedlington Terrier or UKC Champion Fresian Water Dog. There is a big difference if you type into your search engine, “images of Miniature Schnauzers” verses “images of AKC Champion Miniature Schnauzers.” You will pull up a WIDE assortment of images. Some will be great. Others not so great. Some will be worthless. And others will be totally off the mark. You need to have enough knowledge to filter through the images, finding the best images to suit your needs.

Use a little caution when looking up information online. Always remember – not everything posted on the internet is correct or presents the best image of a breed. Make sure you use all your resources to gather the most accurate information possible.

3672638_lWatching videos on the breed in question is also a great option. Again, a word of caution – not every “how to video” on the internet will be beneficial. Today, anyone can post a video online. Unfortunately, there is a lot of poor quality grooming being featured – especially if it is free. Go to trusted sources like Learn2GroomDogs.com that are truly qualified to demonstrate how to groom a particular breed.

Yes, you need to do a little research. Will it require a little effort? Yep.

However, if you have those three nuggets of knowledge, you will have the foundation skills to groom any breed.

  1. strong technical skills
  2. solid comprehension of canine anatomy
  3. ability to interpret the breed standard

With those 3 skills, you can groom any breed of dog that comes your way.

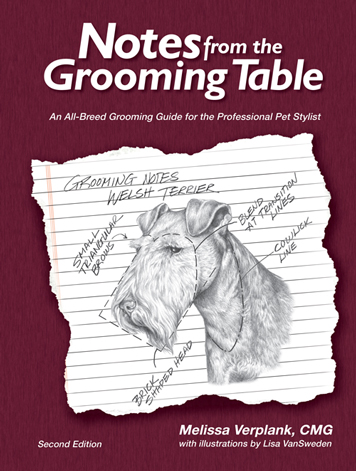
If you are a newer stylist or just don’t have the time to do all the research, there is a shortcut. Notes From the Grooming Table will allow you to fast track your knowledge. Simply grab the book and turn to the breed you have a question about. We are just about to release the fully updated Second Edition of Notes From the Grooming Table. Keep your eyes open for how to get this revised edition – announcements on how to get yours will be available soon.

As pet groomers and stylists, we get to see plenty of dogs. It’s rare and exciting to get a breed you are not familiar with. Most of us pros enjoy the challenge of learning about a new breed. Figuring out what we will need to do to make the dog look like it should – or could – look like if the owners allow you to groom it correctly.

I know, I know… many owners just want the hair shaved off once they walk through your door. Or the dog is in such poor condition, the only humane option is to shave the coat off and start over. That’s always a disappointment once you’ve put in effort to educate yourself. Hopefully, the new client motivated you to learn few new things you can add to your knowledge toolbox even if you didn’t get to execute the trim!

Happy Trimming!

~ Melissa

P.S.

Did these tricks help? Go online and tell us what you think on the Learn2GroomDogs Facebook page.


Westminster Dog Show: What I’m Watching For This Year

1rrFebruary is Westminster dog show month! It is one of the few dog shows getting full national TV coverage at the Groups and Best In Show levels. I look forward to it. Every. Single. Year.

I will be parked in front of my big screen TV for both nights watching and studying.

This year I’m even more excited. The 140th Westminster Dog Show is coming on the heels of a two-day advanced grooming session we just filmed for Learn2GroomDogs.com.

Master pet stylist, Irina “Pina” Pinkusevich, was our guest Training Partner. Guess what? Just three years ago she won the prestigious Groomer of the Year Award which was presented at the Westminster Kennel Club Dog Show. She worked on six different dogs, all in show trims:

  1. Miniature Poodle in a Continental Trim
  2. Kerry Blue Terrier
  3. Bichon Frise
  4. English Setter
  5. English Springer Spaniel
  6. American Cocker Spaniel

Pina is one of the most advanced educators in our field. Every time I see her work on a dog, I learn something. These lessons were no different. What I especially love about Pina is that she has the inside scoop. She knows the hot styling trends and/or the direction they are going from the conformation show ring.

If you are focused on expanding your career as a high quality pet stylist, it’s more than just washing and knocking the hair off pets. It’s about anatomy. It’s about geometry. It’s about balance. It’s about style. It’s about bringing out the best of a dog based on its written standard. It’s about creating artful illusions. The art of pet styling is sculpting fur.

With every L2GD film shoot, I take detailed notes. With Pina, I find it challenging to keep up. My fingers never stop on my keyboard as I watch her work. I always walk away with loads of notes from her lessons.

Here just three takeaways that I learned from Pina two weeks ago. As I watch this year’s dog show, I will be noticing how these particular trends apply to the dogs in the ring on Monday and Tuesday nights.

Takeaways From the Learn2GroomDogs.com Film Sessions with Irina “Pina” Pinkusevich

Number 1: The ⅔ to ⅓ Rule

I’d never heard this rule of balance, style, and proportions before. Pina said when a dog is in properly balanced, the ratio is ⅔ to ⅓. Two-thirds makes up the front section of the dog. One-third makes up the rear of the dog. When trimming, the tuck-up or front jacket will be placed at the dividing line between the ⅔ and ⅓ points to create proper balance on a dog.

To test the theory, we pulled a number of images of top winning show dogs.

Dang!

There it was there over and over again. I also pulled images of the gorgeously groomed dogs Pina has done for Learn2GroomDogs.com.


Yep… the rule holds true on all of them, too.

This rule might be a new concept to many of us, but it’s been put into practice in the conformation ring for quite some time.

I will be watching to see how this rule plays out on the big screen at the dog show.

Number 2: The Lowest Point on the Throat is Level with the Topline or Loin

What??!

The throat is level with the topline? Seriously? This one caught me off guard. But then I started looking. Really looking. Sure enough. There is was over and over again. It especially held true on the Sporting dogs.

OK, I get it. Level with the back but what if you have a dog with a “sloping topline?” Now where do you take the point of reference from? The loin. It’s the point just in front of the hip bones on the top of the back. Draw an imaginary line from that point level and straight forward to the throat. That’s the lowest point on a clipped throat.

“Huh…,” I thought as I raised a questioning eyebrow. I will be on the lookout for this new grooming development. I saw how the rule held up in the Sporting dog images we pulled – but would it hold up to other breeds in different groups as well? I can’t wait to see how many Sporting Dogs utilize this “rule.” Trust me – I’ll be looking!

Number 3: Use the Front Pastern as a Guide When Setting the Undercarriage on Well Coated Dogs

Really?!

There is a point of reference when setting this line? Who knew? Certainly not me! I would just eyeball it and pray. My guess is I’m not the only one out there who has used that technique.

This principle applies nicely to many of the Setters and some of the Spaniels in the Sporting Group – as long as they have long enough furnishings to pull it off.

I’ll be keeping my eyes peeled to see if this third rule applies to other breeds, as well.

We had many more aha! moments while we watched Pina work her magic on these six lovely dogs. We will be releasing Pina’s latest L2GD video lessons all through 2016.

The three points I chose to outline here are all points I’ll be looking for closely as I watch this years televised Group and Best in Show classes at the 140th annual Westminster Dog Show.

People say to me all the time, “But I only groom pets… I don’t need to know how to groom show dogs.” You know what? I only groomed pets, too. But that never stopped me from learning as much as I can about what different breeds SHOULD look like. If you don’t have any reference as to what a nice representation of a breed looks like, how are you going to know how to bring out the best of any purebred or mixed breed?

Watching a dog show of this caliber keeps me fresh and excited. Watching top stylists at work, like our Training Partners with Learn2GroomDogs.com does, too. I hope you will join me as I hunker down Monday and Tuesday night to watch the show. I know I’ll have a pencil and paper close by to take notes!

February 15 and 16, 2016 marks the 140th Westminster Kennel Club Annual Dog Show. There are 199 breeds and varieties are eligible to compete. For 2016, there are nearly 3,000 dogs entered. For more information on the dog show, streaming or television schedules go to: http://www.westminsterkennelclub.org/

Happy Trimming!

~ Melissa

P.S.

Did these tricks surprise you? Go online and tell us what you think on the Learn2GroomDogs Facebook page.


Maintain a Steady Pace

Speed is the key to being a successful pet groomer. Have you watched a highly proficient pet stylist at work? They don’t race around frantically. They don’t whip from one task to the next with lightning speed. They are not frazzled. They are not stressed. They blow through 10, 12, even 14 dogs with ease.

How do they do it?

business-womanHow do they manage a full day and still get home to meet their kids coming off the bus from school? They still manage to get to the gym after work. They enjoy their own dogs when not grooming client’s pets. They have the time AND energy to have a life when they step away from the grooming table.

Do you?

When I observe these successful groomers, I’ve noticed important traits they all share. They work with a steady pace. They have a rhythm to their tasks. Their tempo doesn’t change. They follow the same order as they work on each pet. Their tools are laid out in an orderly fashion, sharp and within arm’s reach. They are not distracted by ringing phones, tales from their fellow team members, nor the personality of the pet they are working on. They are focused and efficient as they work around the pet. There is no wasted effort. No wasted motion.

There are methods to each grooming job. Following a particular order with each type of groom will assistance you with getting through the tasks the quickest. There will be five main types of jobs you do every day – day in – day out at any grooming shop.

The five types of grooming jobs

1. Short haircuts, six weeks or more
2. Short haircuts, six weeks or less
3. Guard comb trims
4. Bladed body with fuller legs and/or furnishings/pattern trims
5. Bath and brush type pets

Generally speaking, the faster you can get a dog to the tub, the faster the trim will go. Dogs with six weeks or less coat growth can normally go straight to the tub. With today’s products, shampoos, conditioners, and high velocity dryers, much of the pre-work can be eliminated. Dematting or pre-trimming is a waste of time with six weeks or less trims.

When it comes to haircuts or finishing a bath and brush dog – pay attention to the order you work. Develop an order – the same order every time for each of the five grooming jobs. If you struggle with remembering the order, write it down and post it at your grooming station. Time yourself on each task. Work on improving your speed with small components within each job. Don’t jump around.

Always follow the order.

Watch top stylists at work. Watch their videos. Sit ringside at grooming competitions and watch the leading stylist compete. With consistent repetition, you’ll increase your speed in no time. You’ll have more time to spend enjoying your free time doing what you want to do. The stress and frustration will be highly minimized. And the best part – you’ll make more money, in less time!

Don’t hurry or rush around frantically to get the job done. Maintain an easy pace and work steadily. Remember the fable of the tortoise and the hare? Highly productive people work a certain rhythm that allows them to flow through enormous amounts of work without becoming stressed or anxious.

Here is a great Learn2GroomDogs.com video lesson that shows how the pros get it done.  Join today!
Happy Trimming!

~ Melissa

P.S.

Do you have any tricks like this one? Tell us about them on the Learn2GroomDogs Facebook page.


How to Brighten a Dogs Coat Using a Staple Pantry Item

Today, we have a wide assortment of products to make our grooming jobs easier. They give us better results and may even help us do the job faster. It could be anything from a shampoo, to a coat conditioner. It might be a magical spray or powder you apply to the coat. Take a look at any grooming catalog and you’ll find a vast array of items from a variety of manufacturers that can take care of just about anything you could need.

But how do you know exactly what to reach for when a unique situation presents itself? Sometimes you don’t always know what you need. Or maybe what you need is a specialty item and you don’t have it at your fingertips. What do you do then?

Smart groomers and stylists often turn to home remedies. Years before we had the variety of products we do today, most clever groomers turned to their own cabinets for solutions. They used their ingenuity and developed home remedies to solve their grooming dilemmas.

Recently on the Learn2GroomDogs.com set, we had an unusual situation. Luckily, we had the masters of home remedies in for a filming weekend, Lisa Leady and Suesan Watson. (If you haven’t caught their L2GD lesson on home remedies – click here! Not only is it educational, the sister duo missed their true calling as a comedy routine!)

All of the dogs for that filming weekend were dogs that were supplied to us, sight unseen. We’d simply made the request for eight dogs.

The criteria was:

  1. They needed enough fur so that Lisa and Sue could actually groom them.
  2. The dogs needed reasonably nice temperaments.

That’s it.

While we were at lunch, the dogs were checked in. Our team had placed them in a holding area to await their afternoon film session. When we returned, we were excited to see what was we had to film. I knew all our afternoon dogs were mixed breeds that had come from a large 300+ dog puppy mill rescue that took place a few years ago. Luckily, all of the dogs found loving homes. The family supplying the dogs for the Learn2Groom film shoot had adopted three of the puppies. Many of the rescued pets were Shih Tzus, Pomeranians, Malteses, or mixes of the three breeds.

When we walked into the kennel room at the Paragon School of Pet Grooming, we were so excited. Every dog was adorable! But one really stood out – a Pomeranian/Shih Tzu mix. It had plenty of coat that brought out a few key features, making him even more appealing. But it did have a problem – and it was smack dab on the top of his head: a huge, rusty-colored lick stain.

If you’ve been in this profession for any amount of time, you know exactly what we were looking at. Apparently, one of his four-legged siblings had taken to cleaning the top of his head on a frequent basis. The constant licking had turned the white fur a rusty red color. He also had a fair amount of rust staining near his eyes and around his mouth.

Sue immediately reached for this little cutie. As she was snuggling with him she looked me right in the eyes and said, “Do you have any ketchup?”

What?

Why did Sue want ketchup?? Even though I hadn’t said a word, my expression must have asked the question.

Sue quickly went on to explain that ketchup would lighten the stain on the top of the dog’s head. “Really?” I exclaimed. I didn’t bother to question her – I knew she had something good up her sleeve. Sue said it didn’t matter what brand of ketchup we chose – any ketchup would work. I quickly went and found a couple packets of ketchup in the kitchen and handed them to her.

We took the dog out onto the practical skills floor and set him on a grooming table. Sue simply opened a package of ketchup and started to apply it to the dry coat. She generously worked it into the top of his head, under his eyes, and on his muzzle area. Once the ketchup had thoroughly saturated the hair, we set this little guy aside to sit for about 30 minutes before bathing him.

I was amazed after Sue bathed and dried this little dog. The rust-colored staining was significantly lighter! Was it gone altogether? No. But it was considerably lighter on the top of his head. Around his eyes and on his muzzle area it was almost totally removed.

I was astounded.

Sue suggested that we do a couple more applications in the future to really lighten the top of his head.

After seeing what a single application of ketchup (yes ketchup!) had done to brighten this dog’s coat, there was no doubt in my mind that a few more applications would lighten the stain even further.

I love home remedies when it comes to grooming. These problem-solvers are made from items that you just naturally have on hand. Many times they are common pantry items that all of us have hidden away in drawers or cupboards.

Who knew you could use ketchup to lighten and brighten the coat? It was a new one for me.

Watch for Suesan Watson in an upcoming Learn2GroomDogs.com video lesson featuring this adorable little Pomeranian/Shih Tzu mix.  Join today!

Happy Trimming!

~ Melissa

P.S.

Do you have any tricks like this one? Tell us about them on the Learn2GroomDogs Facebook page.


Making the Most of a Seminar

When you attend trade shows and clinics, preparing in advance can help you make the most of this experience.  Seminars are a great way to improve your skills and recharge your batteries.  Meeting your mentors and soaking up their knowledge is a fantastic opportunity, and if you can see and hear them in action, it maximizes the experience.  When you know what you need and what you hope to get out of the session, you can better prepare yourself to squeeze out as much as you can from your time together.

1.  Step into the session with a very open mind.

If you are young and fresh to the industry, the amount of information that you get can be intimidating.  Listen, take notes, and soak up every bit of knowledge that you can.  Sometimes that may mean suspending what you know in order to make room for something new.  Trying new techniques or ideas can be uncomfortable just because you’ve never tried it before.  Keeping an open mind enables you to break from your routine to get different results.  With time and practice, the awkwardness goes away and you become more efficient.  Remember: having more tools, techniques, and knowledge allows you to have multiple approaches to a problem.

2.  Make efficient use of the time available.
Many trainers at these sessions have limited time.  They are often rushing from one obligation to another – judging competitions, speaking in seminars, or providing hands-on clinics.  If they can, many will take the time to answer your questions.  If you know what you need to ask, it helps you make the best use of the brief time you may have together.  Be prepared – write down your questions in advance so you don’t forget something important or stumble over your words.  Being ready to participate in the learning experience helps you make the best use of the session – and the presenter will respect you for it.

3.  Don’t be nervous – plan ahead.
With so much to see and do at trade shows, it’s easy to feel overwhelmed.  Break out the catalog and study the floor plan before you arrive.  Map out your plan of attack to make sure you get to everything you need to see.  Some shows have free apps you can download to help make the most out of your experience.  Know the schedule of events so you don’t miss that speaker you’ve been hoping to see.  Sometimes it’s good to go to shows like this with a friend – divide and conquer, then compare notes later.

As your knowledge and skills advance, the clinics won’t be as daunting. They will become a great way for you to fine-tune your skills.  You can begin to network and exchange thoughts with others in the industry who can provide insight when you need it.  Plus, these types of functions are a great way to invigorate your career.

These principles remain valid for many forms of advanced learning in the pet grooming industry. Maybe you don’t have the opportunity to do a hands-on training session. There is a wealth of information to learn from these all-star pet stylists. You might be in the audience at a trade show, pet grooming competition or watching a grooming video lesson featuring one of these top stylists. The better you can execute the core skills with your everyday grooming, the easier it will be to successfully transfer their lessons to your own grooming table.

If you are not as accomplished as these award-winning and highly successful pet groomers are – take note. You can learn a lot from their well-developed skills. Learning new skills, tips, and tricks make grooming pets all that more fun!

Click here to register to see Pina Pinkusevich in Grand Rapids, Michigan.

Happy Trimming!

~ Melissa

P.S.

Do you have any tips to share?  Jump over to the Learn2GroomDogs Facebook page  and tell us.


What Is the Difference Between Rakes and Undercoat Rakes?

Illustration 1

Illustration 1

These tools can be confusing. When you read their descriptions in catalogs, they’re so similar…

They do the same thing, don’t they?

No, they don’t. Let me explain.

Both remove undercoat on thick coated dogs. It’s the METHOD of removal that varies. One pulls out dead and shedding coat without cutting the fur. The other has sharp, curved teeth which remove the undercoat but will also cut the coat. One is used primarily on dry coats, both before and after the bath. The other is effective prior to shampooing, during the bathing process, and after the dog is clean and dried.

Illustration 2

Illustration 2

The difference isn’t so much in the names. The names are interchanged all the time. To keep them straight in my own mind, I call them different things. It’s particularly beneficial when giving directions to others to utilize different names.

Rakes

Rakes are designed to pull out dead coat and shedding fur with ease. Typically they are a T-shape (see Illustration 1) with rounded pins on the head of the T. On some heads, the top bar is long, up to 6 inches across. On other designs, the head may be only a couple of inches wide. The length and shape of the teeth will vary, too. On some rakes (see Illustration 2), the teeth are short and shaped almost in a tiny cone-type fashion. With others, the teeth are long, sinking deeply into heavy, long coats. On almost all models, the handle comes directly out from the cross bar head with all the teeth.

This type of rake is designed to remove dead coat while not damaging the healthy coat. You work the tool in the natural direction of the coat growth. Care must be used not to sink the comb too far into a dense coat repeatedly with too much pressure. Tugging too firmly on a thick or tangled coat will be uncomfortable for the dog and difficult for the groomer. Repeatedly digging in too deeply could injure the skin, as well.

Illustration 3

Illustration 3

Used correctly, rakes can be highly efficient for removing dead coat or “lint” from rustic-coated breeds. They are used primarily on double-coated, heavy-coated, or rustic-coated dogs.

Undercoat Rakes

Undercoat rakes have many small, sharp, curved blades set close together that remove undercoat. They are available in a variety of tooth widths, making this tool suitable for a wide range of breeds. On shedding breeds, they can remove dead, fuzzy undercoat in minutes, yet leave the top coat shiny and healthy. On harsh-coated dogs, they mimic the hand-stripped look quickly and easily.

Undercoat rakes can be used on a wet or a dry coat. Pull the rake in the direction of the coat growth.Always start with a wider toothed rake to start (see Illustration 3). Work down to narrower teeth as the tool pulls through easily, removing less and less coat.

Undercoat rakes normally work better when used prior to bathing or in the tub on a wet coat.

Use caution when working with this tool. On some coat types, especially heavy-coated dogs, they will cut the top coat while removing the undercoat. While the blades are curved (see Illustration 4), you still need to be careful how much pressure you put on the tool as you drag it through the coat so you do not injure the skin. Use caution when working around areas where the skin is thin like in the hock area, ear junctions, flank, and armpits.

Illustration 4

Illustration 4

Undercoat rakes work well on many coat types including double coated breeds, heavy coats, and rustic coat types. The work exceptionally well on any breed that is hand-stripped like many of the Sporting or Terrier breeds. Just be sure to monitor your progress as you work this tool over the dog.

Here is a cool trick I have seen used with undercoat rakes. This trick minimizes cutting the coat while pulling out dead coat, particularly once the coat is clean and dry. Simply take a thick rubber band and wrap it around the hooks of the blade (see Illustration 5). The rubber protects the coat from excessive cutting while the rubber helps grip the dead coat, allowing to be pulled out almost effortlessly.

Happy trimming,

-Melissa

Illustration 5

Illustration 5

P.S.

Do you have any tips to share?  Jump over to the Learn2GroomDogs Facebook page  and tell us.


An Easy Way to Create a Poodle Beveled Cuff

As with all grooming techniques, there are many ways to get the job done.

When I was a contest groomer, I always did my Poodle cuffs by hand. I would brush the coat down then give it a quick fluff with my comb. Once it was fluffed, I’d glide a long straight shear in and set the lower edge. Then I’d re-fluff and grab my long curved shears to round and bevel the edges. It was time-consuming.

Done well, the beveled cuffs came out gorgeous. Done poorly, they were a sloppy mess. I had four chances to be perfect with my cuffs – or four chances to really mess up.

For pet dogs, I quickly taught myself another method. It was quick. Fool-proof. And it worked well on most of my shorter stylized pet trims.

On most of my pet trims, I cheated off excess leg hair by skimming it with a guard comb. Not only was it fast – it helped me set the length, too. Once I had the legs roughed in, I would brush the leg coat over the clipped foot with a firm slicker brush. I would slide my hand down the leg with my thumb and first finger resting just below the clipper line on the Poodle foot. My fingers would be my guide as I slid in a small pair of detailing scissors (I choose small shears for the safety of my own fingers!). I would scissor all the way around the cuff line, removing the longer hair.

When I released the coat… voila! A perfect cuff for an active pet. I could adjust the fullness of the beveled cuff by adjusting my scissored line somewhere between the lines of the knuckles of the foot and just below the clipped line on the foot. The lower I was on the foot with my cuff line, the fuller the bevel.

Once my cuff was set, I would neaten and finish the entire leg with shears, smoothing out my guard comb work.

I used this method for years. I even started to incorporate it into my more polished work in the contest ring. It worked well there, too – especially if I used it as a double-check after I did my cuffs with longer shears.

In the past few years, I’ve seen extremely talented stylists start using another method to get perfect cuffs every time. They use a #30 or #40 blade on their clippers! Who knew?

So how do you do it?

It’s very similar to my old method, but instead of shears, pet stylists reach for their cordless 5 in 1 style clipper. They set the blade at the shorter levels, basically the length of a #30 or #40 blade.

Hold the foot off the table at a comfortable level for the pet. With a firm slicker brush, brush all the hair down around the foot. Once the coat is brushed into place, slide your hand down the pet’s leg, thumb and forefinger closest to the foot.

Stop and hold the foot with your fingers coming to rest right at the clipped cuff line. While maintaining your hold on the foot, gently trim at right angles around the cuff with the #30 or #40 blade. Simply touch the coat at the edge line you want to set.

The fullness of the leg coat will determine where you place the line. For fuller legs, use the top of the crease marks on the toes. If the leg coat is shorter, move the line closer to the clipped cuff line.

When you release the coat, the fur will be nicely beveled. The line should be crisp and free of all stray hairs. As with the hand-scissored cuff, check the work from all angles to make sure the cuffs are level from side to side and front to back. Don’t forget to look from table level when inspecting your cuffs for perfection.

It may take a few tries to perfect this technique, but once you do, creating flawless cuffs every time becomes simple. With a well-prepped dog, this technique is fun, fast, and super safe.

Happy trimming,

-Melissa

P.S.

Do you have any tips to share?  Jump over to the Learn2GroomDogs Facebook page  and tell us.


‘Twas the Week Before Christmas

Welcome to my blog!  For the next few weeks, my marketing expert, Joelle Asmondy, will be filling in for me while I work on a large project.  Joelle is a whiz with marketing.  I can’t wait to see which helpful tidbits she shares with you!  Enjoy!


It’s the week before Christmas and everyone rushes
from Bichons to Shih Tzu’s with clippers and brushes.

Tis our busiest season and everyone knows it.
We’re stressed and we’re tired – though nobody shows it!

The shop is set up to be warm and inviting
and we’re all so grateful that no dogs are biting!

With bathers in aprons and stylists in smocks,
our team is assembled and watching the clocks

when out in the lobby arose such a clatter
we ran to the front to see what was the matter.

With leashes in hand, we kenneled pups safely,
(We never take chances with anyone’s safety!)

Our beautiful lobby, once tidy and neat
was now complete chaos with guests on their feet.

The source of the barking and noise was no grander
than just a big dog with delusions of grandeur.

A big ol’ sweet mixed breed so lively and quick,
we knew in a moment he must be “Saint Nick.”

“Saint Nick” is just “Nicky” but everyone knows
the kind of behavior he typically shows:

“Down Nicky! Don’t eat that! Get back here! Stop hissin’!
Don’t do that! Stop barking! Why won’t you please listen?!”

From the top of her lungs her owner did shout,
“Now stop it at once or I’ll take you back out!!”

With legs like a hurricane Nicky did fly
to each couch, chair, and person who stood closely by.

He tangled up leashes, to laptops he flew.

He knocked them aside – stepped on their dogs, too!

And then when we thought he was settling down,
he jumped, and he barked, and spread drool all around.

We all scrambled to help and use calming voices
before customers wished they had made different choices.

Saint Nicky was filthy, from his head to his toes
and his hair was all matted (you know how it goes).

A shoe lace of slobber completed the mess
and where it would land was anyone’s guess.

His eyes – how they twinkled! His dog tags, how clinky!
His coat – how atrociously pelted and stinky!

His sweet little mouth was drawn up in a grin.
We wondered just what in the heck he’d rolled in!

His stump of a tail knocked bystanders down
as he turned, and he dashed, and he slobbered around.

He shredded a jacket with teeth like a knife –
it’s clear he was having the time of his life.

Nick’s owner was clearly in over her head –
her own hair in tangles, her face turning red.

(She’d given no training and took no advice
And now this poor woman was paying the price.)

We got Nicky settled and gave him a bath
and cleaned up the messes he left in his path.

At the end of it all, he shone like a champ.
(We did the best possible – he was still slightly damp.)

He ran to his master, who gave us a smile.
We knew she would need to rest up for a while.

But we heard her say exclaim she drove out of sight –
I’m so sorry ’bout that! Please have a good night!”

Make it a great day!

~Joelle Asmondy

P.S.

How are you getting through the holidays?  Jump over to the Learn2GroomDogs Facebook page  and tell us.


error: Content is protected !!