
One of the fastest ways to build a clientele is to get people talking. You want positive attention, the kind that fuels business growth. Keep this in mind: people never talk about mediocre people, products, services, or companies.
You want to be unique.
You want to stand out.
You want to be interesting.
I’ve used this approach across many of my businesses. When we focused on this method, our growth rates were remarkable. There are many ways to build positive buzz. Many strategies are surprisingly easy to implement, and as a bonus, many are cost-effective. Others require more planning and some financial investment to get the ball rolling.
Choose what works best for your situation and your budget. Whether you’re quiet and shy or bold and outgoing, there are tactics that work for every personality type. The key to making this work is simple:
Know.
Your.
Customers.
- Know what they like.
- Know what makes them smile.
- Know what excites them.
- Know what triggers them, in a positive way.
When you truly understand your clientele, you can create meaningful, memorable experiences. Done well, clients will seek you out. Done poorly, they’ll run in the opposite direction. Most grooming business owners focus on the rational aspects of their business: pricing, scheduling, pet handling, and the finished groom. What often gets overlooked is the emotional experience of the human client. This matters because, while we love the dogs, they aren’t the ones paying the bill.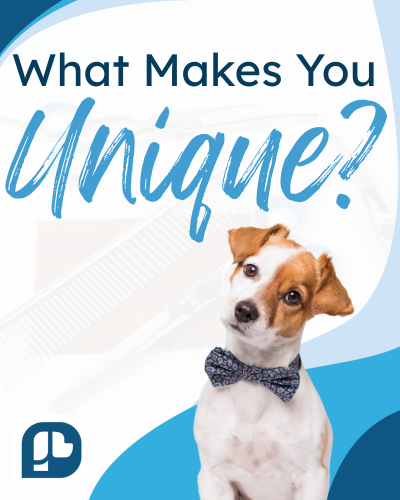
People don’t get excited about ordinary services, acceptable haircuts, or fair prices. They talk about experiences that surprise them and make them feel great about their pets. When you make things special, you make them memorable, and you reduce any perceived risk clients may feel about doing business with you.
It’s not enough to run a good grooming business. You need to stand out. Unique businesses deliver great solutions wrapped in a “shiny package” that delights, excites, or surprises the customer. So what makes up that shiny, unique package? Here are four areas to spark your creativity.
Your Salon
How does your salon look? Whether it’s a home-based business, a small storefront, a large facility, or part of a corporation, your presentation makes an impression. What do clients see when they first arrive? What makes your business stand out in a positive way? Is it your signage, exterior décor, window display, or a clever way of guiding clients to your door? Something should catch their eye.
Once inside, what’s their first impression? Is the space clean, organized, bright, and welcoming? Is your reception area inviting? Are brochures and business cards easy to find? Is your indoor signage clear and helpful?
Now think beyond what they see, what do they hear and smell? Is the music appropriate? Are dogs reasonably quiet? Is loud equipment muffled behind closed doors? Do a “sniff test,” or ask someone who isn’t nose-blind to assess the space. Your salon should smell clean and fresh. If it doesn’t pass the sound or smell test, fix it.
Clients have endless ways to compare service businesses. Even if you’re the only grooming salon in town, you’re still being compared to veterinary clinics, hair salons, spas, and dry cleaners. How do you stack up against other professionals in your community?
Personal Presentation
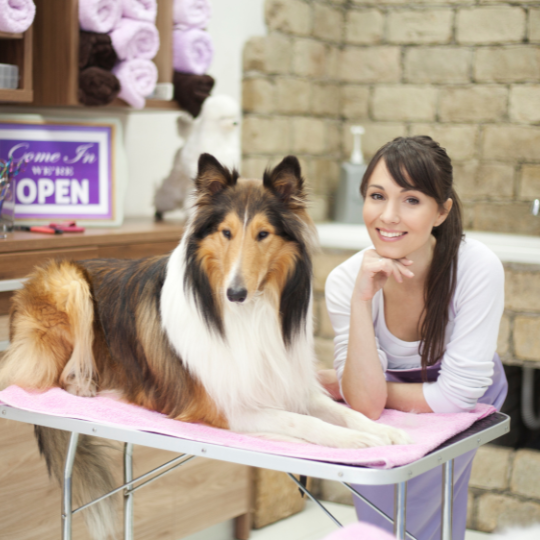 Clients gravitate toward businesses where they feel comfortable. Comfort often comes from familiarity, mirroring how your clients present themselves. Anyone who interacts directly with clients should leave a positive impression.
Your clients are your guests. Treat them that way. If you invited them into your home, wouldn’t you want them to feel welcomed and at ease?
Whether your area is conservative or trendy, a polished, put-together appearance goes a long way. Pay attention to the details. Make sure you’re as well groomed as the dogs leaving your salon. If daily outfit planning feels overwhelming, consider uniforms. Nothing creates cohesion like clothing designed for the job. If you have staff, coordinate your attire so everyone matches. When uniforms start looking worn or tired, replace them.
You spend all day washing and styling dogs, your own hair deserves the same
care. No matter the length, texture, or color, it should be clean and styled appropriately for your workplace. Accessories can make clients smile and help you stand out. Makeup can be an accessory. Jewelry, like earrings or a sturdy bracelet, can add personality. Even fun, comfortable shoes that hold up during long days on your feet can leave a lasting impression.
Your personal presentation can be as unique as you are. Just remember to present yourself in a way that aligns with the clientele you want to attract and makes them feel welcome.
Work Quality
- Pick something and own it.
- Pick a breed.
- Pick a technique.
- Pick a trim.
- Pick a personality type.
- Specialize and do it better than anyone else.
Building a reputation around a specialty makes you memorable. People will talk. New clients will seek you out because they’ve heard how exceptional you are at what you do.
Maybe you love terriers and hand-stripping. Maybe you’re a poodle fanatic who thrives on hand scissoring. Love cats? Enjoy challenging pets? Whatever it is, lean into it. When you deliver exceptional results in your area of expertise, both you and your clients will walk away smiling.
Customer Service
What do you do that makes clients grin and say, “Wow, I can’t believe they just did that!” Customer service starts on the phone and continues through every in-person interaction. All service businesses solve problems. If you can identify and address your client’s pain points, you’re already ahead. Once you understand the issue, offer a thoughtful solution with kindness and confidence.
Sometimes clients don’t even realize they have a problem. That’s where your role as a tactful educator comes in.
Many clients benefit from the trifecta principle of communication:
Tell. Show. Read.
We groom dogs every day, it’s second nature to us. For clients, it’s unfamiliar territory. They won’t remember everything you tell them during their first visit. Reinforce your message by telling them, showing them, and giving them something to read that reinforces what they’ve learned. To succeed, you need clients who keep coming back. Salons that generate positive buzz attract new clients and retain existing ones.
When done well, this approach creates pride but more importantly, it creates security. Security comes from knowing clients value your work and continue choosing your services.
So stand out. Be the positive buzz in your town. If you want a busy business, you need people talking. Finding creative ways to make clients feel special is one of the most powerful marketing strategies you can develop.
Did we miss anything? Head over to the Learn2GroomDogs Facebook page and tell us.
Happy trimming,
~ Melissa
 But how do you feel when that appointment book has empty slots? Maybe you are just starting out on your own and have an open book. Maybe you are new to the salon and need to build a fresh clientele. Or maybe you have been at your salon for a while, yet you’re just not getting traction with repeat customers.
 <
<


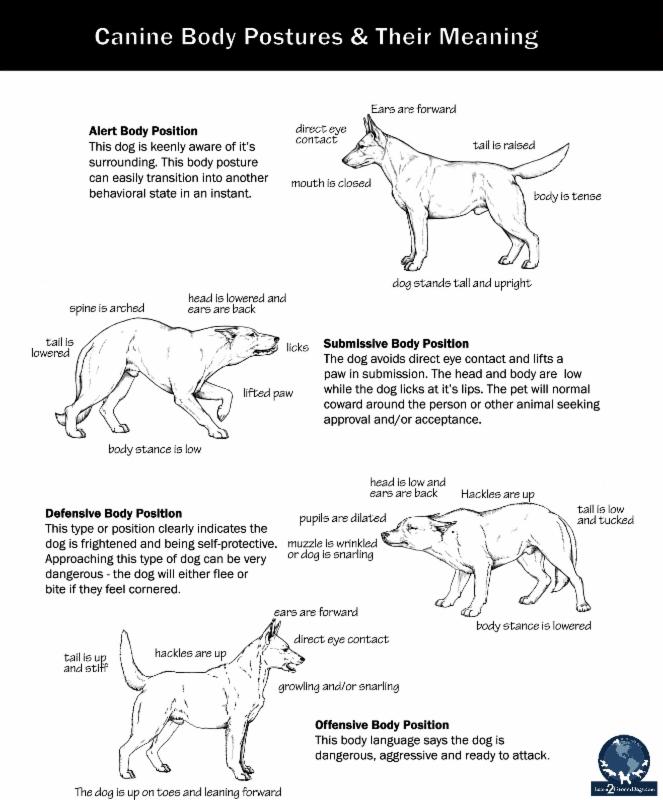
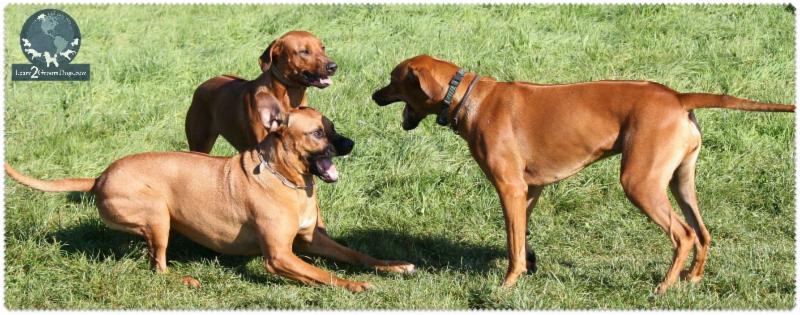 Some dogs receive clear directions from their owners. They have rules and boundaries at home. This makes them very easy to work with in a professional setting. Other pets will not be well-mannered in a professional setting. The personality quirks we all experience working with pets will vary from dog to dog.
 Here is a collection of basic dog postures we see every day. Every position indicates a different attitude. This is by no means everything you will need to know about “reading” dogs. If you are working professionally with them, this is just the tip of the iceberg.
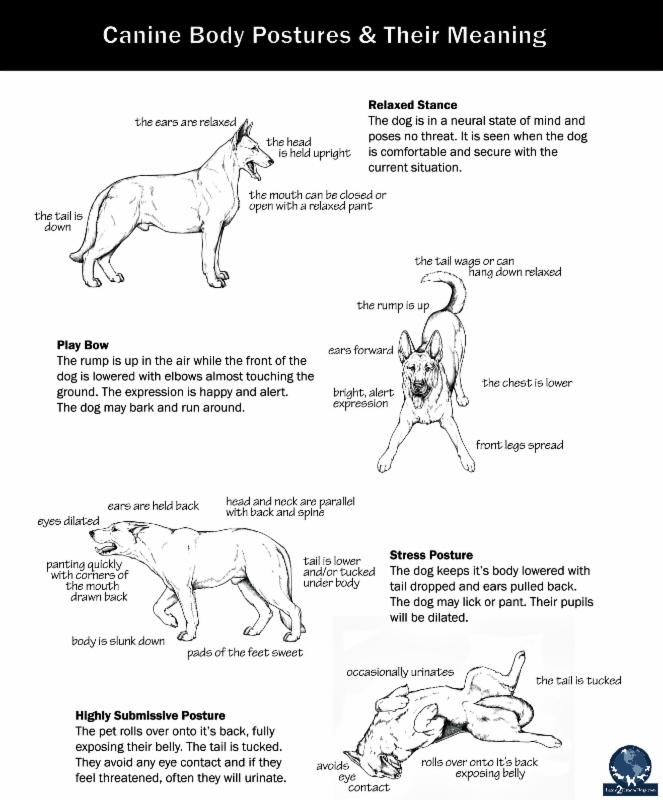
 I knew video content brought clarity to the learning process. We had seen it ourselves with our training program at the
  My jaw dropped. I knew I had found my answer.
 Marc LaFleur: Co-Founder, Assistant Educational Resource Director, Film Director & Cameraman


 After all the B&Bs are bathed, start bathing your trim dogs. Start with the pet that has the heaviest and straightest coat – something that can sit for a few minutes while you bathe your other dogs without risking the coat drying before you get to an active drying method. Let the dog sit in a warm place wrapped in a towel. No need to have air or a dryer on – just plenty of oversized towels with clips. This “wrap a pet” works best after you have thoroughly towel dried the dog.
 For most breeds, the goal is to remove kinks and curls in the coat. Some form of active drying is the only way to straighten the coat while adding lift and volume. On all but the curliest coats, the power from the warm airflow will lift, separate, and straighten the hair shaft for you when used correctly. A few of the curliest coats might benefit from fluff drying with a warmer dryer combined with brushing to get the coat really straight.
 If yours is like most grooming salons, it’s next to impossible to hire the ready-made job applicant. It’s rare to find that person who will be everything you need, right away. Even if you do find great candidates, it’s still going to take work to bring them up to speed. To bring them in line with the way YOU do things in your business. To teach them your culture.
 Observe how they work. Even with the most basic tasks like answering phones or washing dogs, many new hires need to be gently coached. Even if their skill level is weak, if they have the right attitude, you will be able to train them quickly. But you have to understand where they are in their current level of training. And the only way to learn that is by having them demonstrate their work.
 If you’re going to work 2000+ hours per year, don’t you want to be doing something you are passionate about? In a place you enjoy? To be respected? Treated fairly? Providing a valuable service to clients? Of course you do. That’s what we all want.
 Goals & Standards

 My guess is many of you are struggling with a similar situation. Guess what? There is a solution to this problem – and we’ll get to that in a minute.
 If you are struggling with your payroll or running a profitable grooming business, I urge you to review your financial statements. If you struggle with understanding them, get help. The financial numbers do not lie. They are the barometer of your business.
